 roundup
 15 Keyboards With Built-In Microphones for Singing and Learning
We reviewed 15 keyboards with microphones for kids learning music and anyone who loves singing along. Find the best combo for every budget here.
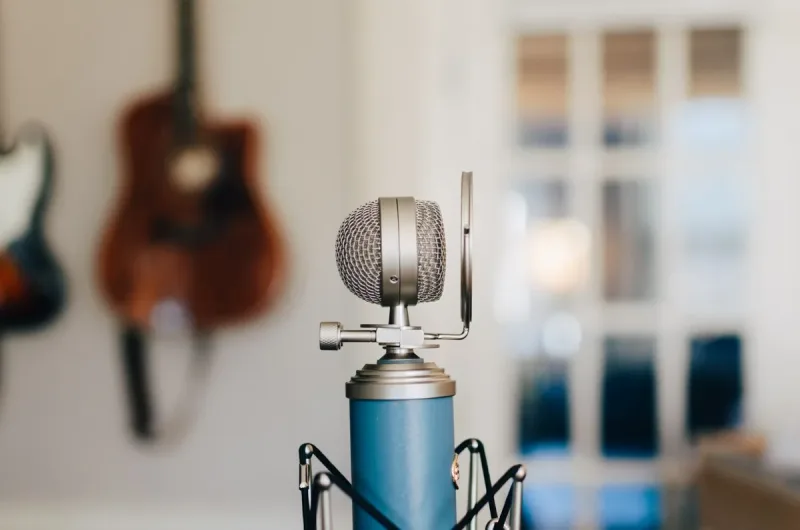
Boom arms, shock mounts, pop filters, and cables. The stuff nobody talks about until a bad one ruins a take. Here's what's worth buying.
We may earn a small commission through links on this page, at no extra cost to you. As an Amazon Associate, we earn from qualifying purchases. Ratings reflect our own editorial evaluation.
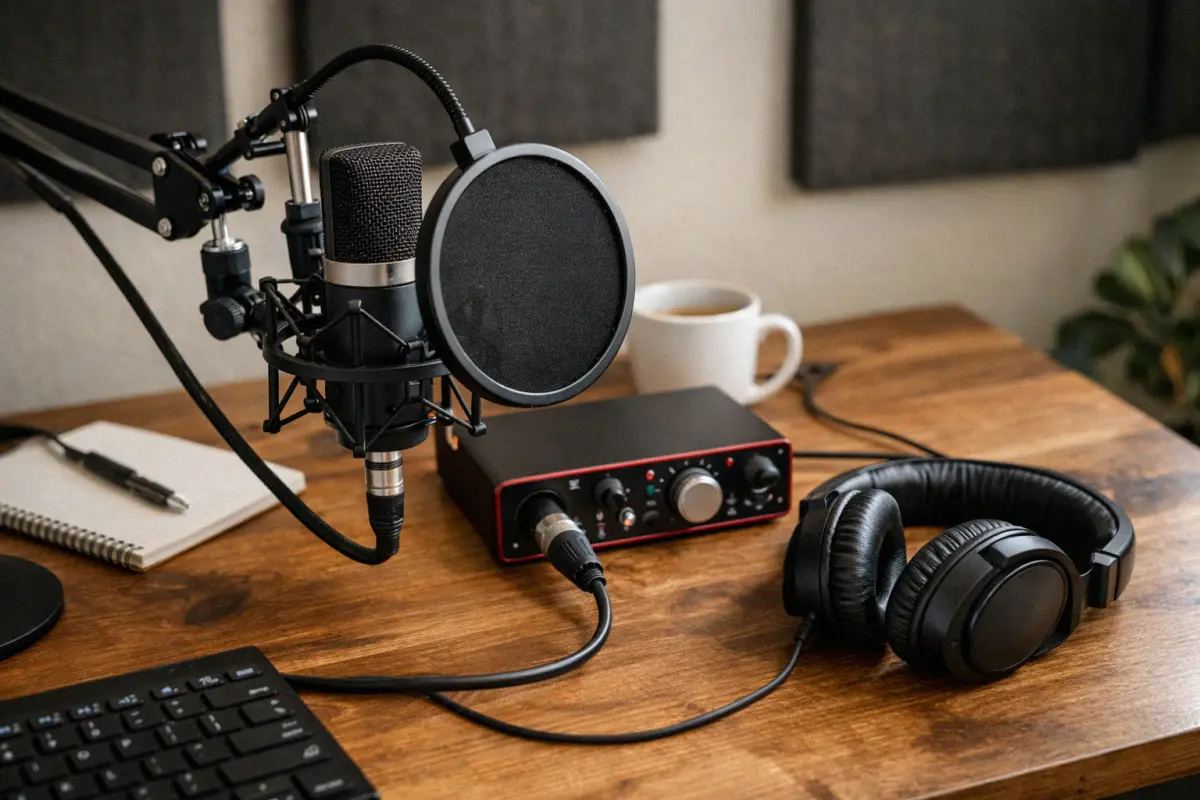
Microphone accessories are the supporting gear (stands, cables, pop filters, shock mounts, preamps, and more) that turn a raw microphone into a complete recording system. Without them, even a great mic underperforms.
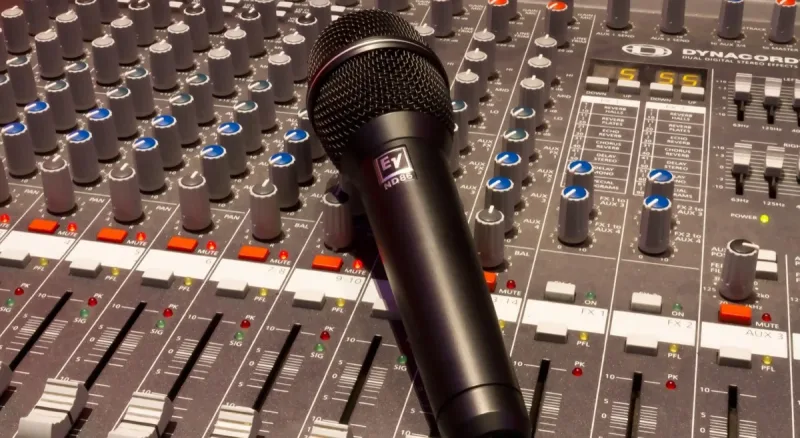
A $400 condenser on a wobbly desk stand, hooked up with a $3 cable, running into your laptop's headphone jack will actually sound worse than a $150 mic on a solid boom arm with a proper pop filter feeding a real audio interface.
Microphone accessories don't just support your mic. They determine whether your recordings sound amateur or professional.
The good news is you can build a solid microphone accessories setup on almost any budget. It comes down to knowing which pieces matter most for how you're using the mic.
Whether you're assembling a podcast studio, a streaming rig, a home recording space, or a live performance setup, here's a complete breakdown of every microphone accessory category worth knowing about: what each one does, when you actually need it, and how much to spend.
A good stand keeps your mic stable, properly positioned, and free from vibrations that ruin recordings. A bad one introduces rumble, handling noise, and constant repositioning headaches.
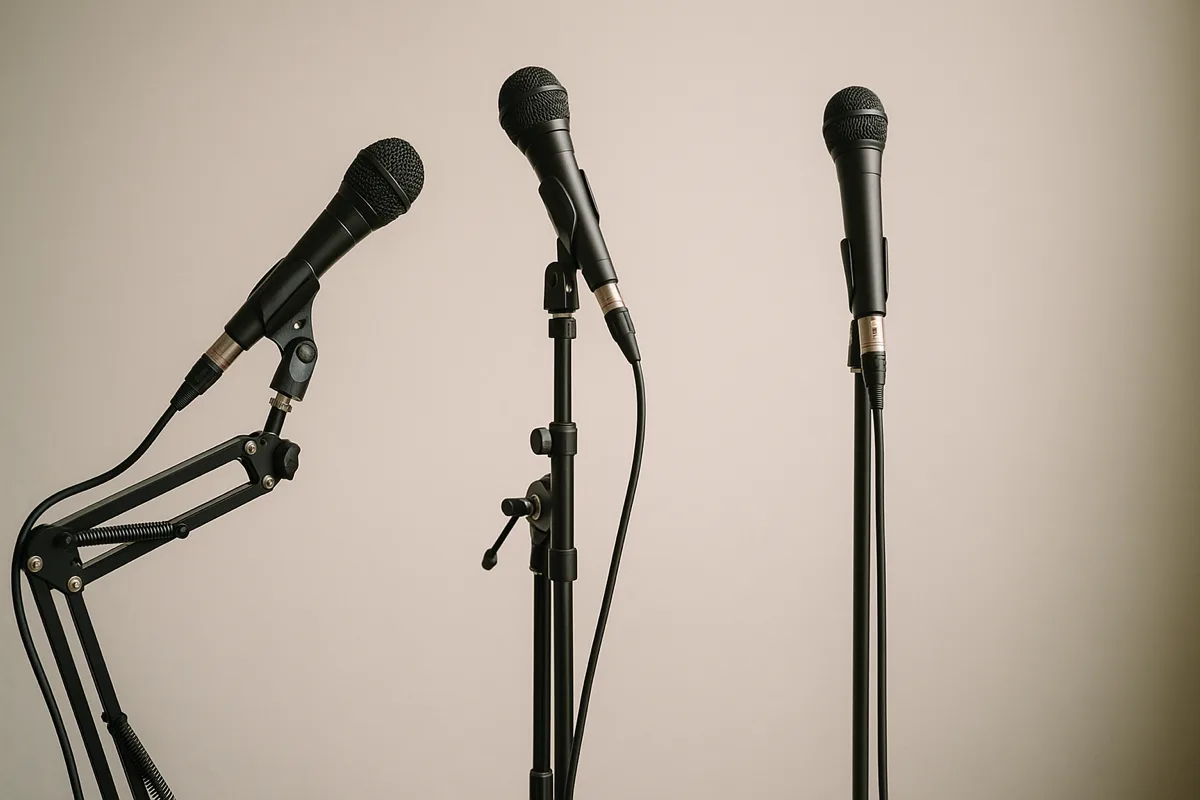
There are four main types of mic stands, and each one serves a different purpose. The right choice depends on where you record, which mic you own, and how much flexibility you need from this foundational microphone accessory.
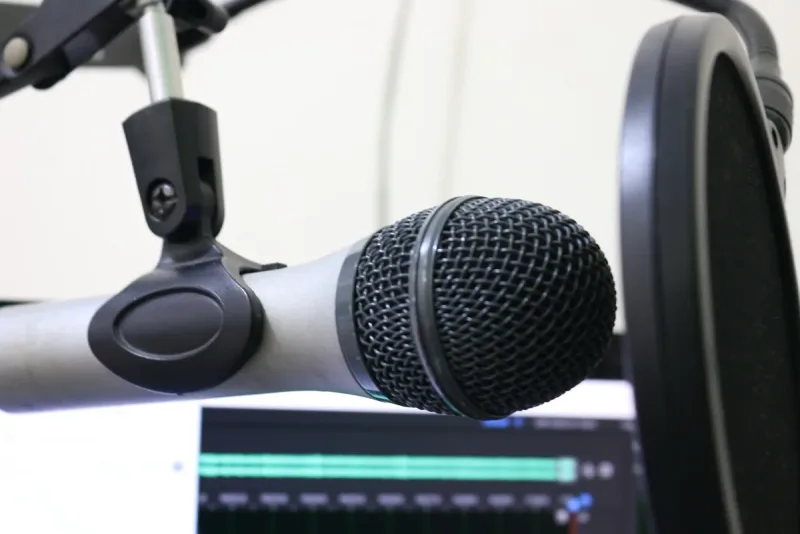
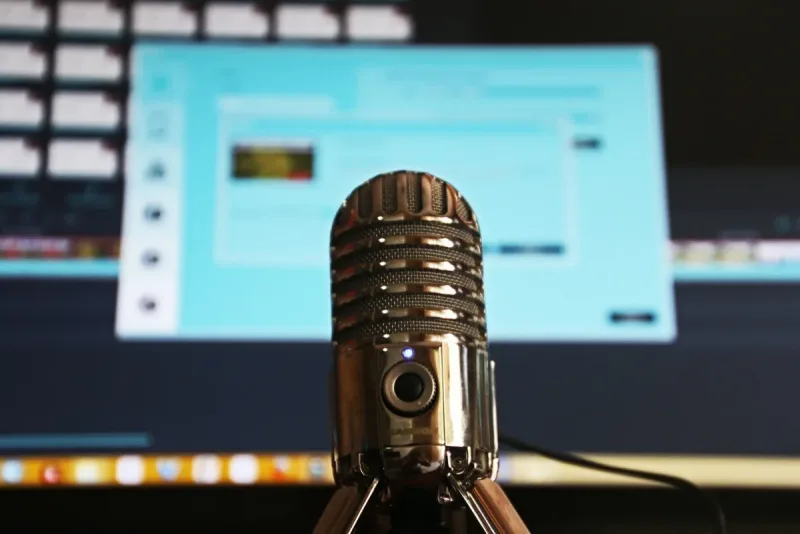
Boom arms clamp onto your desk and swing outward, holding the mic right in front of you without eating up desk space. They're the go-to microphone accessory for podcasters, streamers, and home studio vocalists.
The better ones, like the Rode PSA1+ and Blue Compass, use internal springs instead of exposed external ones, which tend to squeak every time you reposition. Make sure whatever arm you pick is rated for your mic's weight plus any extras like shock mounts and pop filters.
A boom arm that slowly droops under the weight of your mic is worse than useless. Check the rated weight capacity before buying and add up the weight of your mic, shock mount, and pop filter together.
Popular options include the Rode PSA1+ (up to 2.6 lbs), the Elgato Wave Mic Arm LP for low-profile desk setups, and the Gator Frameworks GFWBCBM4000 for heavier broadcast mics. Our guide to the best microphone stands covers the top picks across every price range.
Desktop tripods are compact, portable, and cheap. The tradeoff is height, because most put the mic around chest level, so you're either hunching down or settling for off-axis sound.
A microphone table stand with an adjustable gooseneck helps, but there's only so much a small tripod can physically do.
Full-size tripod stands are a different category entirely. These are the tall floor stands you see on stages and in rehearsal rooms.
They fold up for transport and adjust for height in both straight and boom configurations.
For interviews and field recording, a lightweight tripod with a quick-release clip makes setup and teardown fast. Look for stands with non-slip rubber feet if you'll be using them on hard floors where sliding is a risk.
Desk stands with heavy weighted bases offer more stability than tripods without needing a clamp. They sit flat on the desk and use their own mass to fight vibrations.
Broadcasters have used this style for decades, and the Rode DS1 and Heil Sound HB-1 are popular options. If you want something that looks polished and doesn't budge, custom mic stands pair weighted bases with flexible goosenecks for fine-tuned microphone placement.
Weighted desk stands are particularly popular for broadcast dynamic mics like the Shure SM7B and Electro-Voice RE20, which are heavy enough to stay planted on a solid base without tipping.
Floor stands run the gamut, from basic straight poles on a tripod base to beefy counterweighted booms that reach clear across a drum kit. For live sound, choir miking, overhead drums, or any scenario where the mic needs to be several feet off the ground, a floor stand is non-negotiable.
Whichever stand type you go with, pay attention to thread size. Most mics use 5/8"-27 (the US standard), but European models sometimes use 3/8"-16.
A cheap thread adapter fixes the mismatch, but it's worth knowing before you order. Our microphone stand parts guide breaks down every clip, adapter, and replacement piece you might need.
| Stand Type | Best For | Portability | Stability | Price Range |
|---|---|---|---|---|
| Boom Arm (desk clamp) | Podcasting, streaming, voiceover | Low (stays mounted) | High | $25 – $250 |
| Desktop Tripod | Conference calls, quick recordings | High | Low to Medium | $10 – $50 |
| Weighted Desk Stand | Broadcast, radio, studio voice work | Medium | High | $30 – $120 |
| Floor Stand (straight) | Live vocals, presentations, instruments | Medium | Medium to High | $15 – $80 |
| Floor Stand (boom) | Drum overheads, choir, studio instruments | Low | High | $40 – $300 |
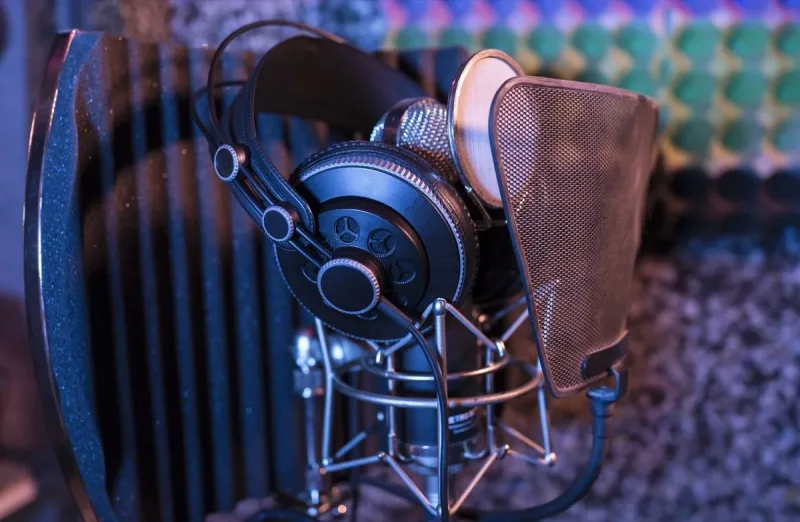
Shock mounts are elastic cradles that suspend your mic, absorbing vibrations before they reach the capsule. If you record at a desk, they're one of the most important microphone accessories you'll buy.
Without a shock mount, every desk bump, footstep, and accidental stand tap shows up as a low-frequency thump in your audio. Your keyboard, mouse clicks, and computer fan all travel through the desk and straight into the mic.
Condenser microphones benefit the most since they're extremely sensitive to mechanical vibration. If you're using a boom arm at a desk, a shock mount is essentially mandatory.
When choosing one, make sure the internal diameter matches your mic's body. Manufacturers sell purpose-built mounts for their specific models, and those almost always fit better than generic universal ones.
A microphone mount that doesn't grip the mic firmly is worse than having none at all, because a loose mic can slip mid-recording and take a damaging fall.
There are two broad categories of shock mounts: spider-style and elastic-band style. Spider mounts use a web of elastic cords stretched across a metal ring to cradle the mic.
Elastic-band mounts use rubber O-rings or silicone bands that wrap around the mic body instead.
Spider mounts generally provide better isolation for heavier mics, while elastic-band designs are more compact and work well with lighter USB mics. Both are significant upgrades over a hard mic clip that transmits every bump directly to the capsule.
For even more isolation, pair your shock mount with a microphone isolation shield. These curved panels sit behind the mic and absorb reflections bouncing around the room.
The two work together to tackle both vibration and room noise simultaneously, a combination that makes a huge difference in untreated spaces.
Plosives are bursts of air that slam into the capsule when you say words with hard "P" and "B" sounds. They create an ugly low-frequency thump that's nearly impossible to fix in post-production.
Pop filters are one of the cheapest and most effective microphone accessories you can buy. They break up that air blast before it reaches the capsule.
You've got two main types: nylon mesh and metal mesh. Nylon pop filters are cheaper and work great for most setups.
Metal pop filters, like the Stedman Proscreen XL, are easier to clean, last longer, and some engineers feel they affect high frequencies less. Either way, every vocal mic setup needs one.
They start at around $8, making them one of the most affordable microphone accessories with an immediately audible impact.
Windscreens (those foam covers that slip over the mic) do something similar but are designed primarily for outdoor use and live performance. They reduce wind noise effectively but don't stop plosives as well as a gooseneck-mounted pop filter.
For outdoor interviews and field recording, a foam windscreen is a must-have microphone accessory. Shotgun mics used in film production also use "dead cat" furry windscreens for harsh wind conditions where foam alone isn't enough.
In live performance settings, many vocalists prefer the built-in foam windscreen over a separate pop filter since it keeps the stage setup cleaner. Some handheld dynamic mics like the Shure SM58 have an internal windscreen built into the grille, but adding a second external foam cover gives extra protection for singers who eat the mic.
Nobody gets excited about buying cables. But bad ones introduce noise, crackling, or random dropouts that drive you crazy trying to diagnose.
Cables are one of the most commonly overlooked microphone accessories, and one of the most frequent failure points in any audio setup. The good news is they're also one of the cheapest things to get right.
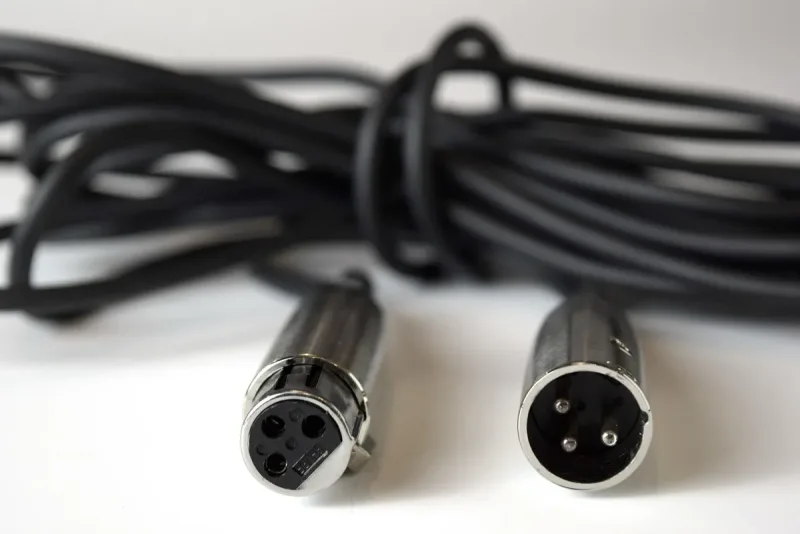
XLR is the standard professional audio connector. It carries a balanced signal, meaning it naturally rejects electromagnetic interference from power cables, monitors, and nearby electronics.
If your mic has an XLR output and you're running it into an interface or mixer, use an XLR cable. Don't adapter it into something else unless there's literally no other option.
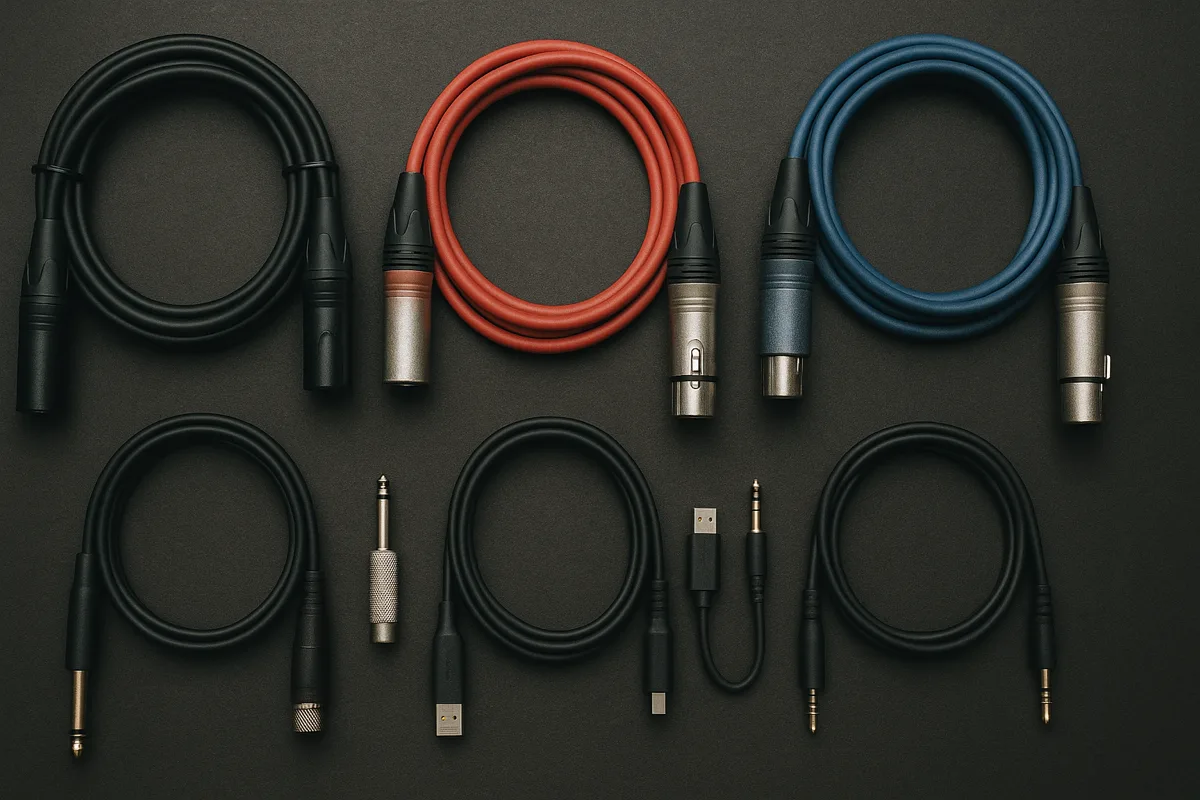
Good XLR cables use oxygen-free copper conductors, braided or spiral shielding, and Neutrik or similar quality connectors. You don't need to spend $50 on a single cable, but don't grab the cheapest one on the shelf either.
Something in the $10–$20 range from brands like Mogami, Hosa, or Pro Co will last years without introducing noise or interference. Our microphone wire guide covers what to look for in detail.
USB mics have the analog-to-digital converter built into the mic body, so the USB cable carries both power and digital audio. Cable quality matters less for noise rejection since the signal is digital.
That said, cheap USB cables can still cause random connection drops and power interruptions. Stick with the cable that came with your mic or grab a name-brand replacement, especially for longer runs where data integrity matters more.
USB-C is becoming the standard on newer mics, replacing USB-A and Micro-USB connections. If your mic uses USB-C, check whether it supports USB 2.0 or 3.0, because the cable type needs to match for reliable data transfer and power delivery.
At some point, you'll need an adapter. XLR to 1/4", 3.5mm to XLR, USB-C to USB-A, and the combinations pile up fast.
The rule of thumb: use as few adapters as you can, and spend a little more when you do. Each adapter adds a potential failure point and a slight impedance mismatch that can affect audio quality.
A microphone connector guide helps you figure out exactly what you need without buying the wrong thing. For wireless setups, wireless microphone adapters let you turn a wired mic into a wireless system by attaching a plug-on transmitter to the XLR output.
| Cable/Connector Type | Signal Type | Balanced? | Common Use | Key Consideration |
|---|---|---|---|---|
| XLR (3-pin) | Analog audio | Yes | Professional mics to interfaces/mixers | Always use balanced runs; avoid cheap connectors |
| USB-A / USB-C | Digital audio + power | N/A (digital) | USB microphones to computers | Cable length over 10 ft can cause data issues |
| 1/4" TRS | Analog audio | Yes (TRS) / No (TS) | Instruments, some mic preamps | TRS is balanced, TS is not, so don't mix them up |
| 3.5mm (1/8") | Analog audio | Usually no | Lavaliers, consumer devices, camera mics | Unbalanced; keep cable runs short to avoid noise |
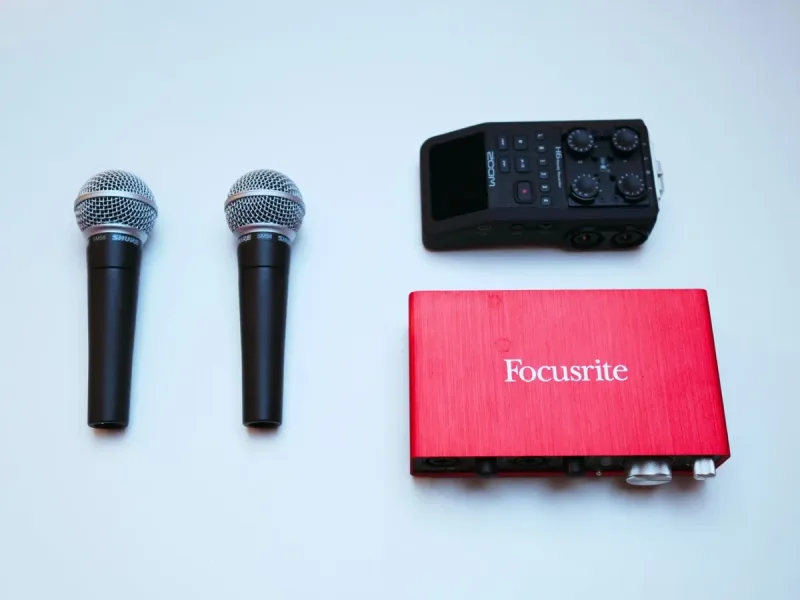
If you're running an XLR mic, an audio interface is one of the most critical microphone accessories in your chain. It sits between your mic and computer, supplying phantom power for condensers, amplifying the signal through its built-in preamp, and converting analog audio to digital.
The preamp inside your interface has a massive impact on sound quality. A noisy one adds hiss to every recording.
Not enough gain means you're cranking the level up, which amplifies the noise floor right alongside your voice. For most home studios, a two-channel interface from Focusrite, Universal Audio, MOTU, or Audient handles everything you need.
Our microphone amplifier guide goes deeper into what separates a mediocre preamp from a genuinely great one.
Already have an interface but need more gain? Standalone mic preamps like the Cloudlifter CL-1, Fethead, or dbx 286s slot in between your mic and interface.
They're a lifesaver for gain-hungry dynamic microphones like the Shure SM7B.
These inline boosters draw power from your interface's phantom power supply and add 20–25 dB of clean gain to the mic signal. The dynamic mic capsule itself never sees the phantom voltage.
One more thing on the power side: condenser mics need 48V phantom power to function at all. Most interfaces provide it, but always verify before buying a mixer or standalone preamp.
Understanding what gain does on a microphone helps you avoid the most common interface-related mistakes.
The small pieces that physically attach your mic to a stand are easy to overlook, but these microphone accessories matter more than you'd expect.
A standard mic clip needs to fit your mic's diameter snugly. Too loose and the mic droops, too tight and you'll damage the finish.
A microphone clamp is a sturdier alternative to a basic clip. Clamps use a threaded mechanism that locks the mic firmly, making them ideal for situations involving movement or vibration.
Drum mic clamps grip directly onto the rim of a drum shell, holding the mic in position without a separate stand. For CB radio users and mobile setups, a CB microphone holder mounts the mic within arm's reach of the driver.
Multi-clamp adapters let you hang pop filters, lights, phones, or cameras off the same stand as your mic. They're a real space saver for cluttered desks and compact studio setups.
Thread adapters are another small but essential piece of mounting hardware. The 5/8" to 3/8" adapter is the most common, and it bridges the gap between US-standard mic clips and European-standard stands.
Keep a couple in your microphone accessories bag so you're never stuck at a gig with incompatible hardware.
Hard cases with custom foam inserts are the safest way to transport and store microphones, while soft pouches work for lighter home storage needs.
Microphones are precision instruments with delicate capsules and sensitive electronics. Dropping a condenser even a few inches onto a hard surface can permanently wreck the capsule, making a good case one of the smartest microphone accessories investments out there.
A decent microphone case with custom foam inserts offers the best protection for transport. Soft pouches work for home storage but won't survive impacts during a commute or gig.
For stands and boom arms, microphone stand bags keep everything organized and safe on the move. A good one has padding, a shoulder strap, and room for two or three collapsed stands along with clips and adapters.
For long-term storage, keep mics in their case with a small silica gel packet to absorb moisture. Ribbon microphones should be stored upright so the ribbon element doesn't sag over time.
Always cap any mic that's going to sit idle for more than a few days. Dust creeping into the capsule is a slow, silent killer of fidelity.
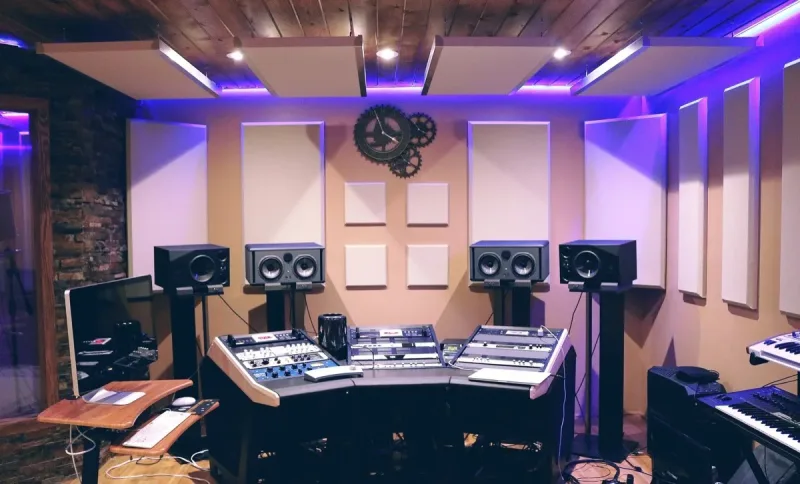
Room acoustics are the single biggest factor most people completely ignore when buying microphone accessories. You could own a $3,000 mic, but if your room sounds like a tiled bathroom, that's exactly what your recordings will capture.
Sound bounces off hard walls, floors, and ceilings, creating reflections that hit the mic milliseconds after the direct sound. That hollow, echoey quality is a room problem, not a mic problem.
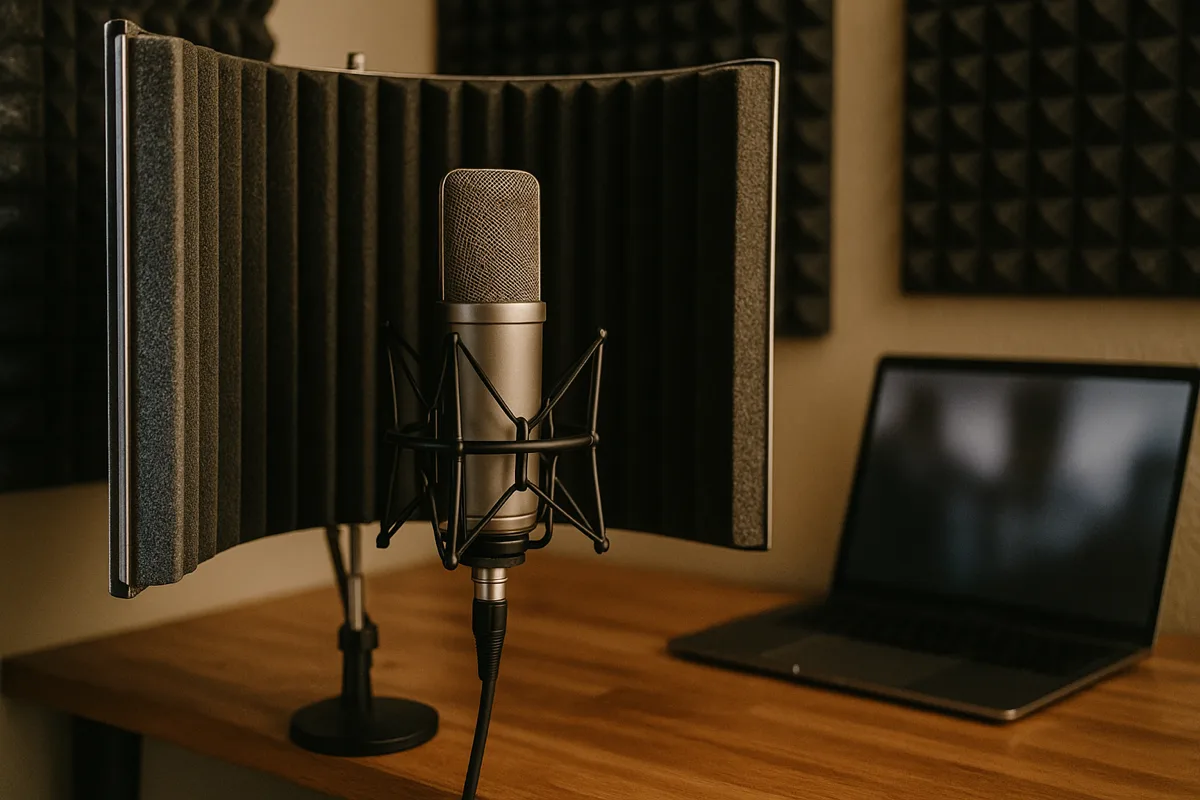
A microphone isolation shield positioned behind the mic absorbs a big chunk of those reflections. These portable shields work especially well for voice since the source is close and the shield only handles what bounces from behind.
For more serious treatment, portable vocal booths wrap around more of the mic and absorb sound from additional angles. Proper acoustic panels and bass traps mounted on walls tackle broader room resonance and standing waves.
Isolation shields and full room treatment solve different problems. Shields handle the immediate reflections behind the mic.
Panels and bass traps address the broader acoustic character of the entire room.
If you can only pick one on a budget, an isolation shield gives you the biggest improvement per dollar for voice recording. It's one of the highest-value microphone accessories for anyone recording in a bedroom, home office, or untreated apartment.
DIY solutions work too. A $30 moving blanket hung behind your recording position makes a bigger difference than most people expect.
Even a closet full of clothes can serve as a surprisingly effective vocal booth in a pinch.
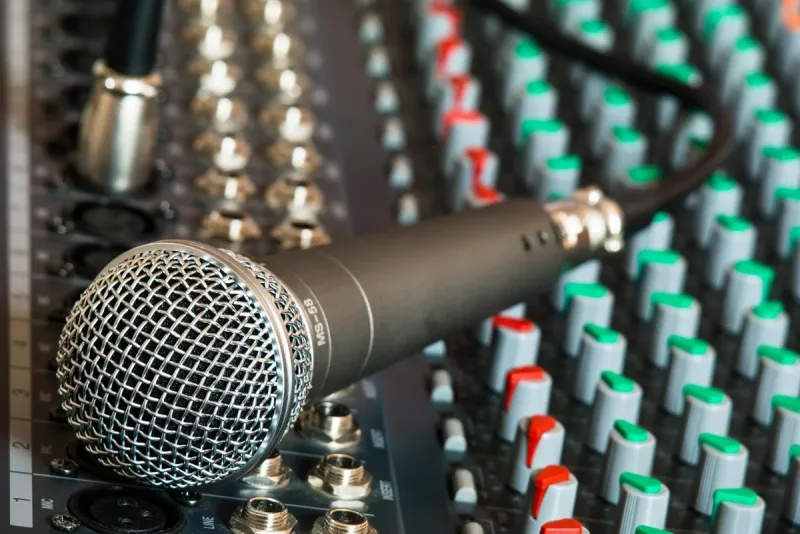
A mixer takes multiple audio inputs and lets you tweak level, EQ, and routing on each one independently before blending them into a single output. For multi-host podcasts, band rehearsals, or panel discussions, a mixer gives you real-time control over the balance between sources.
For most setups, a microphone mixer with four to eight channels provides more than enough flexibility. Look for built-in USB output, per-channel EQ, phantom power, and headphone monitoring.
The Yamaha MG series, Allen & Heath ZEDi, and Mackie Mix are popular mixer choices at different price points. USB-equipped models eliminate the need for a separate audio interface, simplifying the signal chain for podcast and streaming workflows.
A microphone compressor smooths out your dynamic range by keeping loud peaks from clipping while bringing up the quieter parts. Hardware compressors go between the preamp and recorder for real-time processing during livestreams.
Software compressors in your DAW give you more flexibility since you can adjust settings after recording. Which one you pick depends on whether you need real-time control or prefer tweaking after the fact.
For podcasters specifically, the Rodecaster series combines a mixer, audio interface, sound pads, and processing into a single unit, eliminating the need to buy these microphone accessories separately. It's a higher upfront cost but a simpler overall setup.
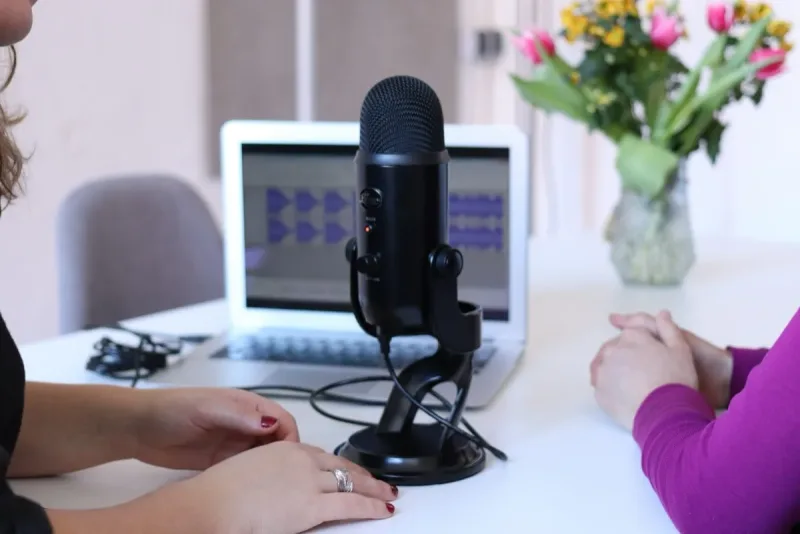
You can't judge your audio quality through laptop speakers, and that's where monitoring headphones come in. They let you hear exactly what your mic is picking up in real time.
Closed-back headphones are the right choice for recording because they prevent sound from leaking out of the earcups and back into the mic. The Audio-Technica ATH-M50x and Sennheiser HD 280 Pro are industry standards in the $100–$150 range.
For tighter budgets, the Audio-Technica ATH-M20x at around $50 delivers solid monitoring quality without breaking the bank.
Open-back headphones sound more natural but bleed audio, making them better suited for mixing and editing after the recording session. Always use closed-back for tracking vocals or any source where the mic might pick up headphone bleed.
Headphone output quality matters too. Most audio interfaces include a dedicated headphone amp that sounds significantly better than your computer's built-in output.
For remote recording sessions or podcast interviews where multiple people need to monitor, a headphone amplifier like the Behringer HA400 splits one headphone output into four. It's a small addition, but for multi-person setups it beats sharing a single headphone jack.
Wireless systems need their own set of microphone accessories, primarily a quality receiver, rechargeable batteries, and potentially antenna distribution hardware for multi-channel setups.
If you're using a wireless mic system, there's a separate set of microphone accessories to consider. A quality microphone receiver is the other half of the equation.
The transmitter sends the signal wirelessly, and the receiver picks it up and outputs a wired signal to your mixer or interface.
Receiver quality directly impacts range, signal stability, and audio fidelity. It makes zero sense to splurge on the transmitter and then cheap out on the receiver.
Rechargeable battery packs extend operating time beyond what disposable AAs can provide, and they pay for themselves after a handful of gigs. Antenna distribution systems and rack-mount kits are additional wireless microphone accessories that matter for professional touring and multi-channel installations.
For simpler setups, a plug-on wireless adapter lets you convert any XLR mic to wireless without buying a dedicated wireless mic. These attach directly to the mic's XLR output and transmit to a compatible receiver, giving you wireless freedom while keeping your favorite wired mic in the chain.
The microphone accessories you need depend partly on what kind of mic you're using. Here's what matters most for each type.
Condensers are sensitive to vibration, plosives, room reflections, and electrical noise. At minimum, you need a shock mount (often included with the mic), a pop filter, a quality XLR cable, and an audio interface that supplies 48V phantom power.
An isolation shield is strongly recommended since condensers pick up room reflections that dynamic mics would ignore. Acoustic treatment behind and around the recording position amplifies the benefit further.
Because condensers have higher sensitivity, you'll also want closed-back headphones for monitoring, because open-back cans can bleed enough audio to get picked up by the mic during quiet passages.
A hard case is another worthwhile microphone accessory for condensers, since their capsules are more fragile than dynamic designs and don't tolerate rough handling during transport.
Dynamic mics are more forgiving, but they still have specific microphone accessories needs. Gain-hungry models like the Shure SM7B or Electro-Voice RE20 often need an inline preamp boost from a Cloudlifter, Fethead, or sE DM1 Dynamite.
Alternatively, choose an interface with at least 60 dB of clean gain. Our guide on what microphone boost does explains the options.
A boom arm and pop filter are still important microphone accessories for dynamic mics. Shock mounts are less critical than with condensers but still useful at a desk where keyboard vibrations travel through the stand.
Dynamic mics don't need phantom power, so your interface choice is simpler, but make sure it has enough clean gain. Interfaces with only 50 dB of gain may not be sufficient for low-output models.
For live performance with dynamic mics, the microphone accessories list is even shorter: a quality XLR cable, a sturdy floor stand or clip, and a foam windscreen are usually all you need. The mic's built-in ruggedness handles the rest.
USB mics simplify the chain by eliminating the need for an audio interface. Your essential microphone accessories narrow down to a stand or boom arm, a pop filter, and potentially a shock mount.
Since USB mics handle their own A/D conversion, cable quality matters less, but a reliable USB cable prevents the random disconnects that plague cheap ones.
A boom arm with built-in cable routing keeps your desk clean, and a foam windscreen adds basic plosive protection if you don't want to fuss with a gooseneck-mounted pop filter. If you're outgrowing your USB mic's limitations, our best microphone under $100 guide covers XLR upgrade paths.
Basic upkeep (proper cable coiling, regular cleaning, and replacing worn elastics) extends the life of your microphone accessories and prevents mid-session failures.
Microphone accessories last longer when you give them basic maintenance. Wipe down mic clips and clamps periodically to prevent corrosion, especially if you use them in humid environments or outdoor gigs.
XLR cables should be coiled properly using the over-under technique, not wrapped tightly around your elbow. Improper coiling stresses the internal conductors and shortens cable life significantly.
Pop filters collect dust and saliva over time. Nylon mesh filters can be removed and hand-washed with mild soap.
Metal filters just need a quick wipe with a damp cloth.
Shock mount elastics lose tension after extended use. If your shock mount starts sagging or the mic feels loose, replace the elastic bands rather than the entire mount, because most manufacturers sell replacement band kits for a few dollars.
For shared microphones in live venues, churches, or classrooms, sanitizing foam windscreens between users is a basic hygiene practice that's often overlooked. Replacement foam covers are cheap and should be swapped out regularly in high-use environments.
Keeping a small maintenance kit for your microphone accessories (spare foam covers, a cleaning cloth, thread adapters, gaffer tape, and a cable tester) saves you from scrambling when something breaks at the worst possible moment.
That $2 XLR cable from a brand you've never heard of is practically guaranteed to cause problems. Bad shielding picks up interference, weak solder joints fail fast, and thin conductors degrade the signal.
Spend $10–$20 on a properly shielded cable and it'll outlast the mic itself. If you're troubleshooting microphone buzzing or crackling, a bad cable is the first thing to check.
Plugging an XLR mic into a 3.5mm input through a cheap adapter is one of the most common beginner mistakes. You're converting a balanced, low-impedance signal into an unbalanced, high-impedance connection.
The result is massive noise, barely any volume, and awful sound quality. If your mic has an XLR output, it belongs in a proper XLR input on an audio interface or mixer.
A pop filter feels like one more thing to buy and mount. But the first time you nail a great vocal take and realize a plosive wrecked the word "podcast," you'll wish you had one.
Pop filters start at $8. Just buy one.
Upgraded your mic, interface, cables, and preamp, and it still sounds echoey? It's the room.
No amount of gear upgrades fixes bad acoustics. A $30 moving blanket hung behind your mic makes a bigger difference than a $200 cable upgrade.
Treat the room before throwing more money at the signal chain.
Every boom arm and stand has a weight rating, and it's easy to exceed it. A mic plus shock mount plus pop filter plus isolation shield can top 3 lbs easily.
If your boom arm is rated for 2 lbs, it's going to droop, slip, or swing into your face. Always add up the total weight of every microphone accessory you're mounting and check it against the stand's rated capacity before buying.
Here are three realistic tiers for building out your microphone accessories, from bare essentials to no-compromise professional.
Grab the essentials and nothing else. A basic desktop tripod or budget boom arm ($15–$30), a nylon pop filter ($8–$12), whatever cable came with your mic, and a foam windscreen ($5–$8).
If you're on a USB mic, you don't need an audio interface, so your total microphone accessories spend stays really low. This setup gets you about 80% of the way to clean audio.
This is the sweet spot where most podcasters, streamers, and home vocalists should aim. A solid boom arm with internal springs ($60–$120), a proper shock mount ($25–$50), a metal pop filter ($15–$30), a quality XLR cable ($15–$25), and a budget audio interface ($60–$130).
Add a basic isolation shield ($30–$50) and the jump from the starter tier is dramatic. You'll hear it immediately.
This is the tier where microphone accessories start making a genuinely professional difference in your recordings.
Every piece is chosen for peak performance. Premium boom arm or studio floor stand ($100–$250), OEM shock mount ($40–$80), metal pop filter ($20–$40), premium XLR cables with Neutrik connectors ($25–$50), and a high-end audio interface ($200–$500).
Round it out with an isolation shield or portable booth ($60–$200), a hard case ($30–$80), and a hardware compressor ($100–$300) for live broadcasting.
| Accessory | Starter ($) | Serious ($$) | Professional ($$$) |
|---|---|---|---|
| Stand/Boom Arm | Desktop tripod ($15) | Quality boom arm ($80) | Premium boom or floor stand ($150+) |
| Shock Mount | None or basic clip | Universal shock mount ($30) | OEM mount matched to mic ($50+) |
| Pop Filter | Nylon mesh ($8) | Metal mesh ($20) | Dual-layer or Stedman ($30+) |
| Cable | Included cable | Quality XLR ($15) | Premium XLR, Neutrik ($30+) |
| Audio Interface | USB mic (built-in) | Budget 2-channel ($80) | Pro interface ($300+) |
| Isolation | None | Basic reflection filter ($35) | Pro shield or booth ($100+) |
| Case/Storage | Original box | Soft pouch ($15) | Hard case with foam ($50+) |
| Signal Processing | Free plugins | Software plugins ($0–$50) | Hardware compressor ($100+) |
| Total | $50 – $100 | $150 – $350 | $500 – $1,200+ |
If you can only buy one microphone accessory at a time, here's the order that makes the biggest difference for voice-focused setups like podcasting, streaming, and voiceover:
1. Pop filter: Cheapest fix with the most immediately noticeable improvement.
2. Proper stand or boom arm: Getting the mic in the right position and keeping it stable kills handling noise and gives you consistent sound.
3. Audio interface (for XLR mics): The preamp quality and A/D conversion in a real interface blow away any built-in soundcard.
4. Shock mount: Eliminates mechanical vibrations, which is essential at a desk with keyboard and mouse.
5. Acoustic treatment or isolation shield: Fixes room sound, which is usually the biggest remaining issue once the first four are sorted.
6. Better cables: Swap your cable if it's introducing noise or dropping signal, but otherwise this can wait.
7. Signal processing: Compressors and EQ are the polish layer that takes good audio and makes it great, but they won't fix fundamental problems.
At minimum, you need a boom arm or desk stand, a pop filter, and closed-back headphones for monitoring. If you're using an XLR mic, add an audio interface to handle phantom power and A/D conversion.
A shock mount and basic isolation shield round out the setup for noticeably cleaner audio. For multi-host shows, you'll also need a mixer or multi-input interface and additional headphone outputs so each host can monitor independently.
Yes. Dynamic mics are less sensitive than condensers, but they still pick up plosives, especially when you're close-miking for podcasting or broadcasting.
A pop filter costs under $15 and eliminates a problem that's nearly impossible to fix in post.
A proper stand or boom arm. It determines mic position, reduces handling noise, and keeps the capsule stable during recording.
After that, a pop filter and audio interface (for XLR mics) make the next biggest improvements to your overall sound.
You don't need $50 cables, but don't buy the cheapest ones either. A $10–$20 XLR cable with proper shielding from brands like Mogami or Hosa will last years and won't introduce noise.
Neutrik connectors are a reliable quality indicator when choosing cables.
No. USB mics have a built-in audio interface that handles A/D conversion and preamp duties, which is the whole point of USB.
The tradeoff is less flexibility if you want to upgrade individual components later.
Most microphone accessories work across multiple mics. Boom arms, pop filters, cables, and interfaces are universal.
Shock mounts are the main exception, because they need to match your specific mic's body diameter, so switching mics often means buying a new mount.
Upgrade in this order: stand or boom arm first, then audio interface (for XLR mics), then cables. These three have the biggest impact on sound quality and reliability per dollar spent.
Plan to spend roughly 50–100% of your mic's price on accessories. A $100 mic paired with $75–$100 in microphone accessories (a decent stand, pop filter, cable, and maybe a basic interface) will outperform a $300 mic with no accessories every single time.
The accessories determine how much of the mic's potential you actually capture.
The right microphone accessories can make a mid-range mic punch way above its price tag. You're not just buying stands and cables.
You're building a system where every piece works together to deliver the cleanest audio your budget allows.
Start with the essentials and add pieces as your needs evolve. Pay attention to the boring stuff like cables and mounting hardware, because those are the parts most likely to cause headaches later.
And don't ignore your room. Nothing improves your sound more than controlling reflections in the space where you actually record.
Browse our microphone accessories reviews below to find the right gear for your setup.
 roundup
 We reviewed 15 keyboards with microphones for kids learning music and anyone who loves singing along. Find the best combo for every budget here.
 roundup
 A cheap microphone connector can quietly ruin your audio. We tested 10 XLR and USB cables from Mogami, Hosa, and more to find the cleanest signal options.
 roundup
 A wobbly desk setup introduces noise no post-processing can fix. We compared 10 microphone table stands and desk arms that keep your mic rock-steady.
 roundup
 A bad microphone wire introduces buzzing and signal loss. We reviewed 9 XLR, USB, and TRS cables to help you find one that keeps your signal perfectly clean.
 roundup
 A microphone mixer gives you hands-on control over EQ, levels, and effects in real time. We reviewed 10 models for podcasting, streaming, and live sound.
 roundup
 CD players with microphones are still perfect for karaoke nights. We rounded up the best CD player with microphone combos for families and party hosts.
 roundup
 Keep your CB mic secure and within reach while driving. We compared 10 CB microphone holders, from magnetic mounts to retractable clips, for every rig setup.
 roundup
 A microphone compressor tames loud peaks and lifts quiet parts for smoother audio. We reviewed 10 options from budget live gear to pro studio racks.
 roundup
 A wobbly stand ruins great recordings. We tested 10 of the best microphone stands, including boom arms, tripods, and desk mounts for every budget.
 roundup
 A solid microphone clamp frees up desk space and keeps your mic exactly where you need it. We tested 10 C-clamps, goosenecks, and heavy-duty mounts.
 roundup
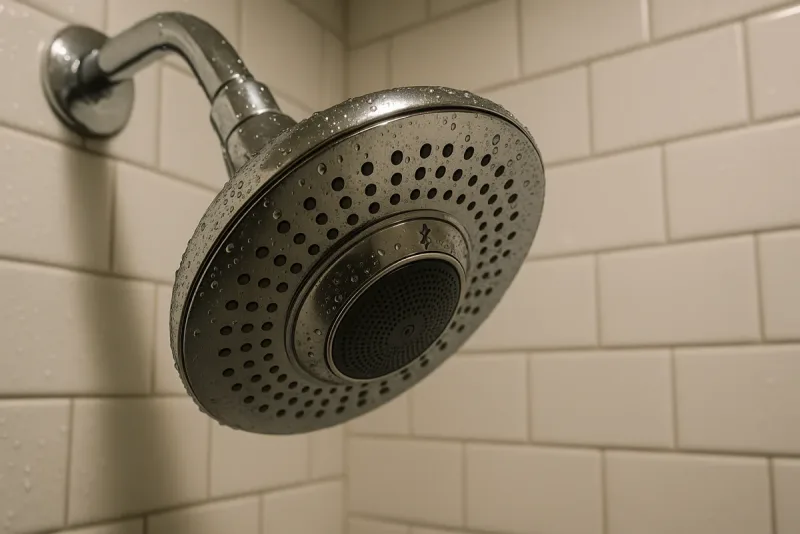
 A microphone showerhead lets you blast music and sing along while the water runs. We tested 10 Bluetooth showerheads that are surprisingly fun to use.
 roundup
 You don't need a treated studio for clean vocals. We compared 10 microphone isolation shields that block reflections and noise, starting under $30.