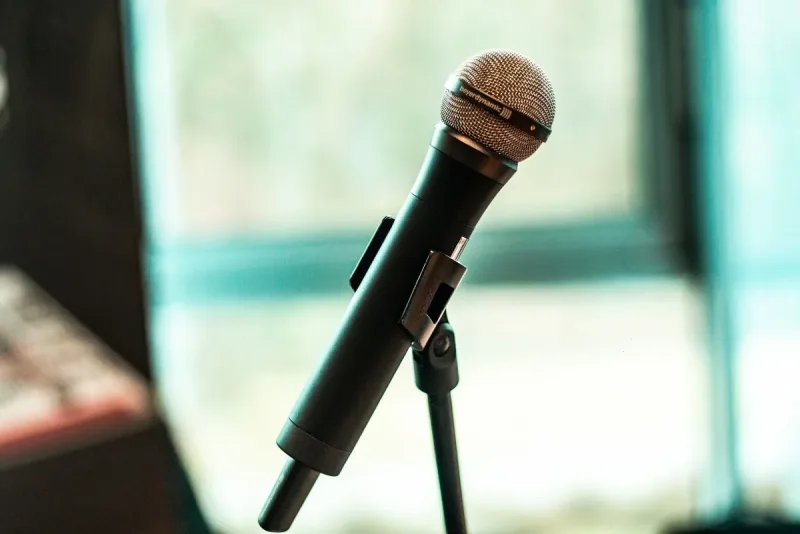
 guide
guide AirPods Microphone Not Working? Step-by-Step Fixes for Every Model
AirPods microphone not working? These 11 fixes solve it fast, from a 30-second reset to hidden firmware updates most people skip. All models covered.
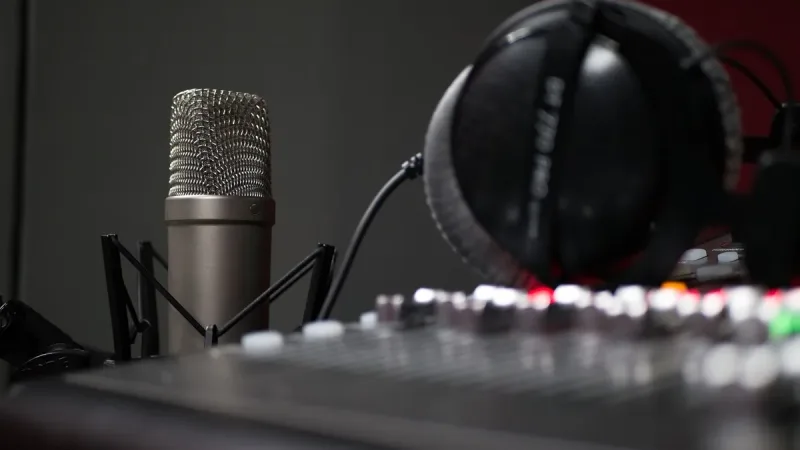
Mic technique, gain staging, polar patterns, and how to kill that annoying buzz. All explained without the audio-engineer jargon.
We may earn a small commission through links on this page, at no extra cost to you. As an Amazon Associate, we earn from qualifying purchases. Ratings reflect our own editorial evaluation.
Think of this page as home base for our entire microphone guides library. It's built for people who want to actually understand how microphones work, not just grab one and hope for the best.
Maybe your podcast recordings sound weirdly thin no matter what you try. Or you're a vocalist who can't shake that annoying feedback loop on stage.
Could be you just spent $400 on a condenser mic and somehow it sounds worse than the headset you had before. Yeah, that happens more than you'd think.
We dig into all of it here: how mics really work under the hood, what those spec sheets are actually telling you, how to choose the right mic for your situation, technique that makes a real difference, and fixes for the stuff that drives everyone nuts.
Whether you're a podcaster setting up your first recording chain, a musician tracking instruments at home, or a content creator trying to figure out why your audio sounds off, these microphone guides cover the ground you need.
Every article in our library tackles one specific topic in detail. This guide connects the dots between them and gives you the full picture so you can jump straight to whatever you need.
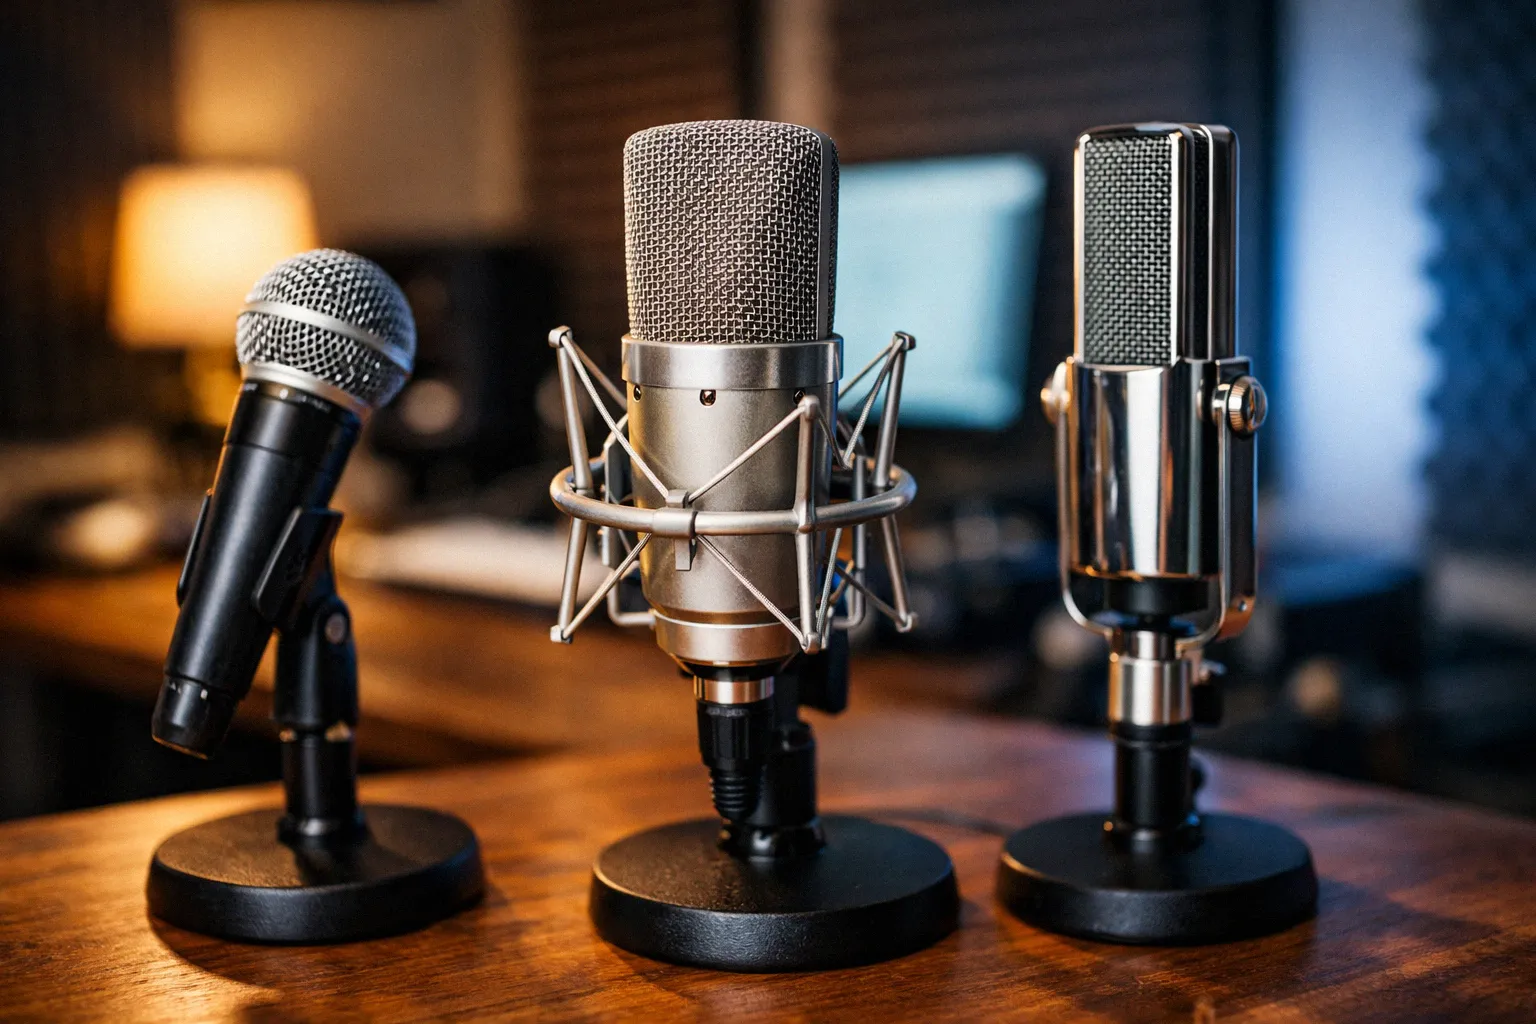
There are three main microphone types: dynamic, condenser, and ribbon. Each one uses a different physical method to convert sound into an electrical signal.
Every mic does the same fundamental job: convert sound waves into an electrical signal. That process is called transduction, and the differences between mic types all come down to how they pull it off.
Dynamic mics use a diaphragm connected to a wire coil sitting inside a magnetic field. When sound hits the diaphragm, the coil moves and generates current through electromagnetic induction.
They're built like tanks, they're affordable, and they handle screaming-loud sources without breaking a sweat. They're just not as responsive to quieter, more nuanced sounds, and they tend to need a lot more gain from your preamp before the signal is usable.
Condenser mics rely on a principle called variable capacitance. Two ultra-thin plates form a capacitor, and incoming sound waves shift the gap between them, which produces a voltage change proportional to the sound pressure.
That lighter diaphragm picks up way more detail and a wider frequency range, which is the reason studios almost always reach for condensers on vocals and acoustic instruments. They do need 48V phantom power from your preamp or interface to charge the capacitor plates, though.
Ribbon mics hang a paper-thin metal strip (the ribbon) between two magnets. Sound waves cause the ribbon to vibrate within the magnetic field, generating a tiny electrical signal.
What you get is a warm, smooth, organic tone that audio engineers often call "vintage." They're fragile and pricey, no question.
But nothing else delivers quite the same character on brass, strings, or guitar cabinets. Modern active ribbon designs have improved durability, but they still require more careful handling than dynamics or condensers.
The capsule is the core of any mic, the transducer element that actually converts sound into signal. Large-diaphragm capsules (1 inch or bigger) tend to grab more low-end detail and sound warmer overall.
Small-diaphragm capsules react faster across the frequency spectrum, which makes them ideal for transient-heavy sources like acoustic guitar, hi-hats, or stringed instruments where accuracy matters more than warmth. Our deep dive into microphone capsules unpacks the engineering behind different designs and how they color your sound.
Sometimes one capsule isn't enough. Microphone arrays arrange multiple capsules in precise geometric configurations, using beamforming algorithms to steer the pickup pattern electronically, reject noise from certain directions, or capture spatial audio for immersive formats like Dolby Atmos.
You'll find arrays in conference rooms, smart speakers, film sets, and increasingly in gaming headsets and laptops. AI-powered beamforming can now track a moving speaker and adjust the pickup direction automatically in real time.
A USB mic is an all-in-one recording device: capsule, preamp, and digital converter built into one unit that plugs directly into your computer. No audio interface needed, no XLR cables to buy, no phantom power to worry about.
For podcasting, video calls, voiceover auditions, and basic content creation, a quality USB mic gets you recording in minutes. Many popular models use the same condenser capsules found in their XLR counterparts, so you'd be hard-pressed to hear a difference in a blind test.
Where USB falls short is flexibility. You can't swap out the preamp or converter independently, you're stuck with whatever gain structure is baked in, and trying to run multiple USB mics at once creates driver headaches on most operating systems.
Latency tends to be higher than what you'd get from a dedicated audio interface, which gets annoying fast if you're monitoring yourself in real time while recording. Some USB mics have a direct-monitoring headphone jack that bypasses the computer entirely, but the implementation varies wildly between models.
Audio quality has improved dramatically in recent USB mic generations. Models in the $100–$200 range now include 24-bit/96 kHz converters, built-in headphone monitoring with zero-latency direct monitoring, and even onboard DSP for real-time effects like compression and noise gating.
If you're recording one voice in a treated room and simplicity matters most, USB is a genuinely smart choice. Once you need multiple simultaneous mics, external processing, or tighter control over your signal chain, XLR through a proper audio interface is the way to go.
A mic's polar pattern tells you how sensitive it is to sound coming from different directions. Get this wrong and everything downstream suffers, because it determines what gets captured and what gets thrown away.
Mess this up and your recordings will suffer no matter what you spend on gear. It doesn't matter if the mic is aimed right at your mouth when its polar pattern is also grabbing your noisy AC unit behind you.

Each pattern has trade-offs, and the key is matching the pattern to your environment and sound source. Here's how the six main patterns compare.
| Polar Pattern | Pickup Shape | Rear Rejection | Best For | Watch Out For |
|---|---|---|---|---|
| Cardioid | Heart-shaped, front-focused | Strong | Vocals, podcasting, live performance | Proximity effect (bass boost up close) |
| Supercardioid | Tighter front, small rear lobe | Good (sides), some rear pickup | Live vocals in loud environments | Small rear lobe can catch monitor wedges |
| Hypercardioid | Very tight front, larger rear lobe | Excellent (sides), moderate rear | Film dialogue, drums (individual) | Must position monitors carefully on stage |
| Omnidirectional | Equal sensitivity all directions | None | Room ambience, roundtable podcasts, orchestras | Picks up everything, including room noise |
| Figure-8 (Bidirectional) | Front and rear, rejects sides | None (front/rear), excellent (sides) | Interviews (two people facing each other), mid-side recording | Equally sensitive front and back |
| Shotgun (Lobar) | Very narrow front beam | Excellent all around | Film/video, sports broadcasting, wildlife | Off-axis coloration, needs careful aiming |
For the majority of home recording and podcasting situations, cardioid is your safest bet. It picks up what's in front and rejects most of what's behind, which works perfectly in a room without acoustic treatment.
Multi-pattern mics let you switch between cardioid, omni, and figure-8 with a physical switch on the body. They cost more upfront but let you adapt to different recording situations (solo vocals one day, a roundtable interview the next) without buying multiple mics.
Our supercardioid guide breaks down the differences between cardioid, supercardioid, and hypercardioid patterns in detail, including when the tighter pickup is worth the trade-offs. For positioning advice, our guide on microphone placement shows you how to set up your mic relative to the sound source for each polar pattern.
If there's one question lurking behind everything else in our microphone guides, it's this: which mic should I actually buy? And the honest answer comes down to what you're recording and the room you're recording in.
Start with your primary use case, not your budget. A $100 mic that's right for the job will outperform a $500 mic that's wrong for it every single time.
Podcasting and voiceover. A large-diaphragm condenser or dynamic with a cardioid pattern is the standard choice. If your room isn't acoustically treated, lean toward a dynamic.
Popular choices like the Shure SM7B, Electro-Voice RE20, and Rode PodMic reject room noise effectively and forgive imperfect recording environments.
Studio vocals and singing. Large-diaphragm condensers shine here because their extra sensitivity captures vocal nuance that dynamics simply can't reproduce. In a treated room, you won't fight the noise pickup that condensers are known for.
Acoustic instruments. Small-diaphragm condensers handle fast transients better than large-diaphragm models. They're the standard choice for acoustic guitar, violin, mandolin, and percussion where accuracy matters more than warmth.
Live performance. Dynamic mics dominate the stage for good reason. They handle high SPL without flinching, survive drops and rough handling, and their directional patterns keep feedback under control in loud environments.
Streaming and gaming. USB condensers offer the simplest plug-and-play setup. If you already own an audio interface, an XLR condenser gives you more flexibility and room to upgrade individual components later.
Film and video production. Shotgun mics mounted on boom poles are the standard for capturing dialogue. Their extremely narrow pickup pattern isolates the speaker from environmental noise, which is essential on location shoots where you can't control the acoustic environment.
Conference rooms and meetings. Boundary mics (flat, tabletop designs) or dedicated conference microphone arrays work best here. They pick up multiple speakers around a table without anyone needing to hold or position a mic.
| Use Case | Recommended Type | Ideal Pattern | Budget Range | Key Priority |
|---|---|---|---|---|
| Podcasting | Dynamic or LDC | Cardioid | $100–$400 | Noise rejection, warm tone |
| Studio vocals | Large-diaphragm condenser | Cardioid | $200–$1,000 | Detail, sensitivity |
| Acoustic instruments | Small-diaphragm condenser | Cardioid | $150–$500 | Transient response, accuracy |
| Live performance | Dynamic | Cardioid / supercardioid | $100–$350 | Durability, feedback rejection |
| Streaming / gaming | USB condenser | Cardioid | $50–$200 | Simplicity, voice clarity |
| Film / video | Shotgun condenser | Lobar | $200–$1,000 | Narrow pickup, off-axis rejection |
| Conferences | Boundary or array | Omnidirectional | $100–$500 | Multi-speaker coverage |
Don't overthink brand names or price tags at this stage. Identify your use case from the table above, match the recommended mic type and polar pattern, then compare specific models within your budget range.
The most common mistake we see in our microphone guides is buying based on what a favorite YouTuber or podcaster uses without considering the difference in recording environments. That creator probably records in a professionally treated room with a $500 preamp chain.
The same mic in your untreated bedroom will sound completely different. Don't copy someone else's setup.
Match the mic to your room.
Second most common: buying a condenser mic for a noisy room. Condensers pick up everything: keyboard clicks, computer fans, street noise, the neighbor's dog.
A dynamic mic with a cardioid pattern handles noisy spaces far better. Third: ignoring the rest of the signal chain.
A $300 mic plugged into a $30 interface with a noisy preamp will sound worse than a $100 mic through a clean, capable interface. Budget across the entire chain, not just the mic.
Once you've narrowed the field, the specs below will help you compare your finalists head to head.
No. A budget mic matched to the right application and room often outperforms an expensive mic used in the wrong environment. The recording space, technique, and rest of the signal chain contribute just as much to sound quality as the mic itself.
Past the $200–$300 range, you're mostly paying for build quality, consistency between units, and specialized tonal characteristics rather than raw performance gains. For most home recording and podcasting, a well-chosen mic in that range paired with a decent interface and basic room treatment will get you professional-sounding results.
The four specs that matter most when comparing microphones are sensitivity, frequency response, maximum SPL, and self-noise. Understanding these lets you make informed comparisons rather than guessing based on price.
Most people's eyes glaze over the second they open a spec sheet. Fair enough, but knowing which numbers actually matter lets you compare mics on substance instead of just assuming the expensive one sounds better.
Sensitivity measures how much electrical output a mic generates for a given sound pressure level. You'll see it listed in millivolts per pascal (mV/Pa) or decibels relative to 1 volt per pascal (dBV/Pa).
A more sensitive mic puts out a stronger signal, so you don't need to crank the gain on your preamp as hard. That matters because pushing gain higher always adds noise to the signal.
A condenser rated at -35 dBV/Pa needs far less gain than a dynamic at -55 dBV/Pa. That 20 dB difference is a big reason condensers tend to sound "cleaner" when you're recording in quiet spaces.
Higher sensitivity doesn't automatically mean better, though. An overly sensitive mic in a loud or noisy environment can overload faster and pick up more unwanted room noise.
Matching sensitivity to your specific recording situation is what actually matters.
Our full guide on microphone sensitivity breaks down the math, what those numbers mean day-to-day, and how sensitivity interacts with the rest of your signal chain.
Frequency response shows you which frequencies a mic can capture and how evenly it reproduces them. It's expressed as a range (like 20 Hz to 20 kHz) with a tolerance (like ±3 dB).
Here's the thing, though: the range matters way less than the shape of the response curve. A mic labeled "20 Hz–20 kHz" with a huge 10 dB spike at 5 kHz will sound nothing like one with a flat response over that same range.
Always pull up the actual frequency response chart when comparing mics. The numbers alone won't tell you much about how it actually sounds.
Vocal mics typically have a built-in presence peak between 3 kHz and 6 kHz so voices punch through a mix. Measurement mics go for perfectly flat response instead.
One isn't "better" than the other. It depends entirely on what you're recording and the result you're going for.
When comparing frequency response charts between mics, pay attention to how smooth the curve looks. Sharp peaks and dips indicate resonances in the capsule design that can make a mic sound harsh or hollow.
A smooth curve, even if it isn't perfectly flat, generally sounds more natural and musical to the ear.
Impedance is the mic's resistance to AC current, measured in ohms. Professional mics run low-impedance (150–600 ohms), which lets you use long cable runs without losing high-frequency signal.
High-impedance mics (above 10,000 ohms) start rolling off high frequencies on cable runs longer than about 20 feet, resulting in a dull, muffled sound. Most modern professional microphones are low-impedance by design.
If you're using a balanced XLR output into a standard interface, impedance matching happens automatically and won't be a practical concern.
Max SPL tells you how loud a source can get before the mic starts distorting. Dynamics handle loud sources with ease, often exceeding 140 dB SPL without breaking a sweat.
Condensers are all over the map, and many include a pad switch (-10 dB or -20 dB) that bumps up the max SPL rating by reducing the output level. Just make sure to check whether a pad is engaged when comparing specs between mics, because it changes both the max SPL and the effective sensitivity.
Self-noise (also called equivalent noise level or EIN) is the noise a mic produces on its own, even in dead silence. It directly affects the signal-to-noise ratio of your recordings. Anything below 15 dB-A is excellent and suitable for the most demanding recording work.
The 15 to 20 dB-A range works fine for most situations including podcasting and home recording. Once you get above 25 dB-A, you'll start hearing hiss in quiet passages and between phrases.
Dynamic mics don't list self-noise specs because they don't have active electronics generating noise internally. The catch is they need more preamp gain to reach usable levels, which means preamp noise becomes the variable you need to watch instead.
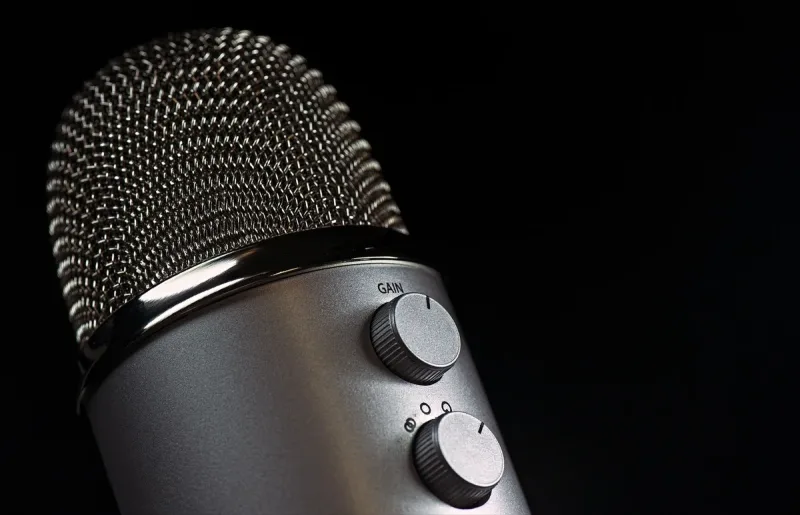
Gain is simply the amplification applied to your mic's raw signal. Every microphone outputs a tiny electrical signal that needs a substantial boost before it's actually usable for recording or broadcasting.
That boost comes from your preamp or audio interface. How much gain you'll need comes down to the mic's sensitivity and how loud the source is.

A soft-spoken vocalist on a dynamic mic might need 50–60 dB of gain to hit a good recording level. Put that same person on a sensitive condenser and you might only need 25–35 dB.
The more gain you dial in, the more noise rides along with the signal. That's why mic-to-source pairing matters so much, because an under-powered preamp struggling to drive a gain-hungry mic is the single most common cause of noisy home recordings.
Our article on what gain actually does on a microphone sorts out the confusion between gain, volume, and level, which are three terms people swap around constantly even though they mean different things. If you're on Windows, our microphone boost guide explains that built-in boost feature and when it actually helps versus when it just piles on noise.
You could own the nicest mic money can buy and still sound terrible if your technique is off. Grip, position, and angle all shape your sound just as much as the mic itself.
Seems obvious, right? Most people still get it wrong. Wrap your hand firmly around the middle of the body, not up on the grille.
Cupping the grille actually changes the polar pattern, turning a cardioid into something closer to omni. It also creates a resonant chamber inside your palm that makes everything sound muddy, boomy, and feedback-prone.
Keep a consistent distance of 2 to 4 inches for speaking, or right against the lips for that close-mic broadcasting sound. Angle the mic about 15–30 degrees off-axis from your mouth to cut down on plosives, which are the "p" and "b" pops that slam the capsule and create distorted thumps.
Our full guide on how to hold a microphone covers grip technique for singers, speakers, and interviewers with photos and specific angle tips for each situation.
Placement is everything in the studio. Shifting a mic just two inches can take a recording from muddy to crystal clear.
Three things matter most: distance from the source, angle relative to it, and height. For vocals, 6 to 12 inches from the capsule is the sweet spot with most large-diaphragm condensers.
Get much closer and the proximity effect kicks in hard, giving you boomy, exaggerated bass. Move too far back and you're capturing more room reflections than actual voice.
Instruments are a different story entirely, and the rules change dramatically based on what's being recorded. Close-miking a guitar amp at 1 inch from the speaker cone delivers a tight, focused, aggressive tone.
Back off to 12 inches and you'll hear more of the speaker cone's natural character blended with room ambience. Stereo techniques like X/Y, ORTF, and spaced pair require two matched mics and specific angle and distance relationships that vary by source.
Our comprehensive microphone placement guide covers positioning techniques for vocals, guitars, drums, pianos, and more, including diagrams for each common setup.
Proximity effect is the bass boost you get when you work really close to a directional mic. Radio DJs lean into it on purpose for that deep, rich, chest-resonance voice that sounds authoritative.
For most recording situations, though, it's just unwanted low-frequency coloration you'll have to EQ out later. Simple rule: the closer you get to a directional mic, the more bass piles up.
Omnidirectional mics don't exhibit proximity effect at all, which is one reason engineers sometimes choose them for close-miked instruments where they want a natural, uncolored low end without the exaggerated bass boost.
If you want the proximity effect without overdoing it, experiment with distance. Start at 12 inches and slowly move closer while monitoring on headphones until the low end fills in naturally without becoming boomy.
Most people land somewhere between 4 and 8 inches for a warm but controlled vocal tone.
Nobody selling microphones wants to tell you this, but a $100 mic in a properly treated room will almost always sound better than a $1,000 mic in a bare, echo-y box. Once you get past the sound source itself, the room you're recording in matters more than any single piece of gear.
Hard, flat surfaces reflect sound back into the mic just milliseconds after the direct signal, creating muddy, boxy recordings. Basic treatment at four key reflection points is usually enough to fix this.
Sound bounces off hard surfaces, and in a typical bedroom or home office, those reflections hit the mic just a few milliseconds after the direct sound. You end up with comb filtering, flutter echoes, and that muddy, boxy quality that no amount of EQ will ever fully clean up.
Parallel hard surfaces are the biggest offenders: two flat walls facing each other, or a hard floor paired with a flat ceiling directly above.
You don't need a professional studio for clean recordings. Hit these four spots: the wall behind the mic, the wall behind you, the first reflection points on each side wall (hold a mirror flat against the wall, and if you can see the mic, that's the spot to treat), and the ceiling above your recording position.
Even thick moving blankets or 2–4 inches of acoustic foam at those positions makes a huge difference. Rigid fiberglass or rockwool panels are a step up and surprisingly affordable to build yourself with basic lumber and fabric.
Corners are another trouble zone that's easy to overlook. Bass frequencies build up in room corners, creating boomy, uneven low end that colors everything you record.
Bass traps, which are simply thicker absorptive panels (4–6 inches) wedged into corners, tame that buildup effectively.
Your noise floor is the ambient sound level in the room when nobody's making a sound. For professional voiceover work, you want to be below 30 dB SPL.
Podcasting? Below 40 dB SPL is workable. Once you're above 45 dB SPL, listeners will definitely notice background noise during pauses and quiet passages.
Common noise sources to address: HVAC systems (turn off while recording if possible), computer fans (move the tower farther from the mic or use a quieter machine), refrigerators in adjacent rooms, street traffic through windows, and fluorescent light ballasts that create a persistent buzz.
Reflection filters and portable isolation shields help reduce side and rear reflections around the mic, but they don't block external noise from entering the room. If outside noise is the primary problem, you need mass and air gaps: thicker walls, double-paned windows, or a dedicated vocal booth with proper sound isolation.
A quick test: record 10 seconds of silence in your room with the mic gain set where you'd normally record. Play it back at full volume and listen critically.
Whatever you hear in that silence is what's going to show up between every sentence you record, during every pause, and in every quiet passage. That's your real noise floor in practice.
The recording signal chain has five stages: microphone, cable, preamp, audio interface, and DAW. A weak link at any point degrades everything downstream.
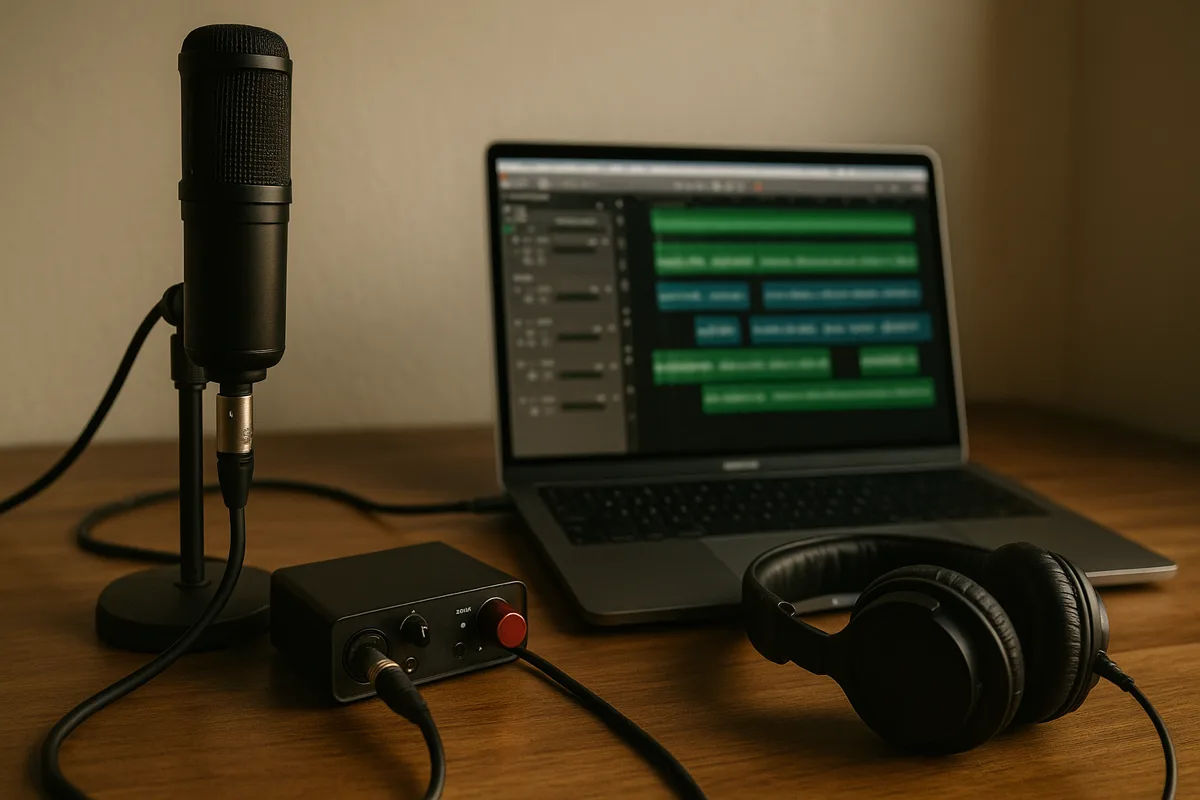
Once you understand how the signal chain works, troubleshooting gets way faster and you stop wasting money on gear that won't fix the actual problem. Here's the path your audio takes from mouth to hard drive.
Microphone. Turns acoustic energy into a tiny analog electrical signal, usually somewhere between 1 and 100 millivolts depending on the mic type and how loud the source is.
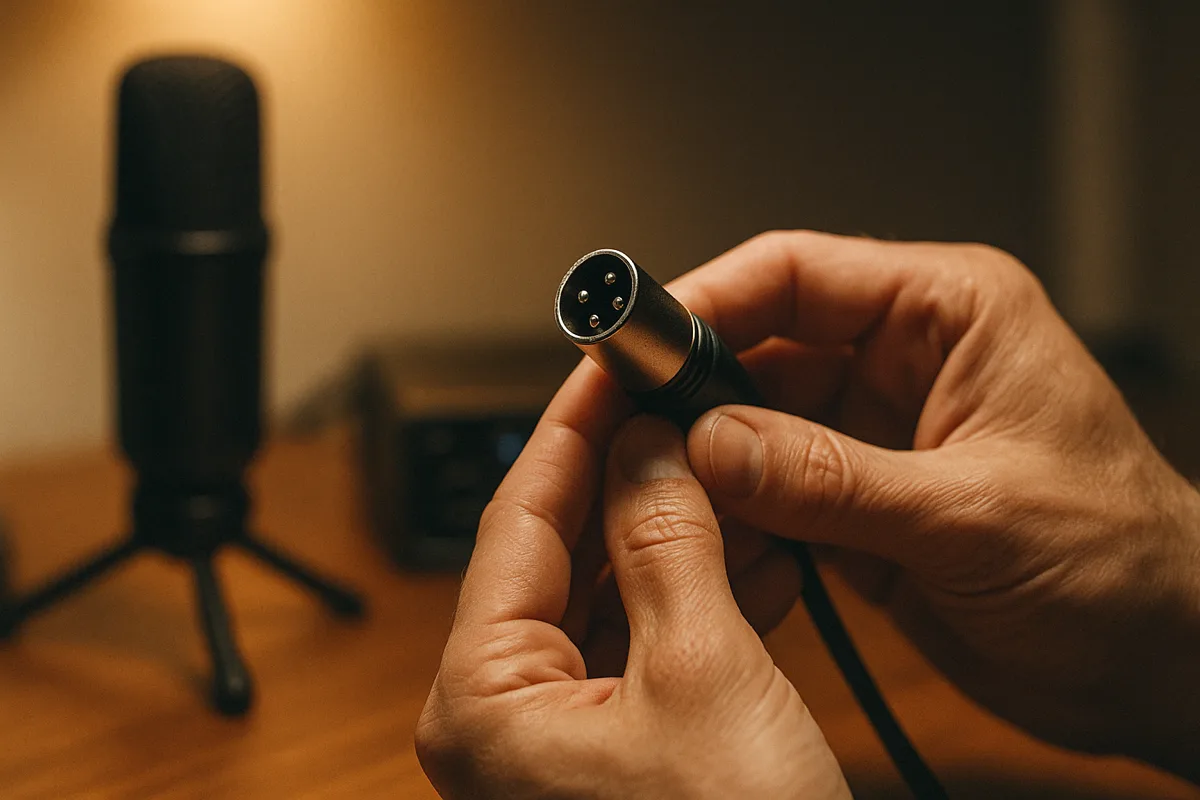
Cable. Carries the mic-level signal to your preamp or interface. Balanced XLR cables reject electromagnetic interference over long runs thanks to their twisted-pair design.
Unbalanced cables pick up noise on anything longer than about 15 feet, which is why professional setups always use balanced connections.
Preamp. Takes that mic-level signal and amplifies it up to line level, which is the standard operating level for professional audio equipment. Most audio interfaces have built-in preamps that are perfectly fine for home recording.
Standalone preamps give you more gain headroom and sometimes add their own tonal character through tube warmth, transformer saturation, or Class-A circuit coloration. This is where the phrase "it's all in the preamp" comes from in studio circles.
Audio Interface. Handles the analog-to-digital conversion (ADC) that turns the continuous analog signal into discrete digital data your computer can work with. Record at 24-bit depth and 48 kHz sample rate for virtually all content creation.
Higher sample rates only matter for specialized professional applications where you need extra headroom above 20 kHz for heavy digital processing.
DAW (Digital Audio Workstation). Where you record, edit, mix, and export your final files. Choices range from free (Audacity, GarageBand) to professional-grade (Reaper, Pro Tools, Logic Pro, Ableton Live).
Your DAW doesn't change recording quality one bit. A 24-bit/48 kHz WAV file from Audacity is byte-for-byte identical to one from Pro Tools at the same settings.
Where DAWs differ is in workflow efficiency, plugin ecosystem, and editing tools, not audio fidelity.
One thing that does affect quality: your buffer size setting. A smaller buffer gives you lower latency (less delay between speaking and hearing yourself in headphones), but demands more CPU power.
If your computer can't keep up, you'll get crackling and dropouts. Start with a buffer of 256 samples and adjust from there based on your system's capabilities.
| Stage | What It Does | Signal Type | Key Spec | Common Mistake |
|---|---|---|---|---|
| Microphone | Converts sound to electricity | Analog (mic level) | Sensitivity, polar pattern | Wrong polar pattern for the environment |
| Cable | Carries the signal | Analog (mic level) | Balanced XLR vs unbalanced | Using cheap unbalanced cables on long runs |
| Preamp | Boosts mic level to line level | Analog (line level) | Gain range, noise floor | Not enough gain for dynamic mics |
| Interface | Converts analog to digital | Digital | Bit depth, sample rate | Recording at 16-bit instead of 24-bit |
| DAW | Records, edits, exports | Digital | Buffer size (latency) | Buffer too small causing crackling |
Most microphone issues trace back to cables, software settings, or electrical interference, not the mic itself. Knowing that narrows your troubleshooting immediately.
Nothing kills a session faster than some weird audio problem you can't explain. Here are the issues that come up over and over, plus what's actually causing them.
That persistent buzz or hum? It's almost always electrical in origin, not a busted mic. Ground loops are the number one cause, and they happen when two pieces of gear in your signal chain are grounded through different electrical paths, creating a loop that hums at 60 Hz (or 50 Hz outside North America).
Electromagnetic interference from nearby electronics, cables with damaged shielding, poorly filtered power supplies, and even dimmer switches on lights in the room are the other usual suspects. Try unplugging devices one at a time to isolate the source before replacing anything.
Our detailed microphone buzzing troubleshooting guide takes you through a step-by-step process to pin down exactly what's causing the buzz and fix it without swapping out gear you don't need to.
Crackling drives people crazy because it tends to be intermittent. It works fine for 20 minutes, then crackles for 10 seconds, then disappears again.
On the analog side, check for loose cable connections (especially at the XLR jack), a dying cable with a cracked solder joint, moisture in the capsule, or corroded connectors.
On the digital side, buffer underruns in your DAW can produce crackling too. If it only happens during playback but the recorded file sounds clean, it's your computer struggling to process audio fast enough, not the mic.
Our microphone crackling guide separates analog causes from digital ones and lays out a clear diagnostic checklist to find the source quickly.
Mic sounds too quiet even with gain cranked? Run through these in order: Is phantom power on (condensers won't work without it)? Do you have the correct input selected on your interface?
Is the cable fully seated at both ends? Did someone accidentally flip the pad switch on the mic body?
Past the basics, certain mic-preamp combos simply don't have enough gain available. Dynamic mics like the Shure SM7B are notorious for being gain-hungry, needing 60+ dB of clean gain to reach proper recording levels.
A budget interface putting out 50 dB of maximum gain just won't get there cleanly. You'll need either a better preamp with more gain on tap or an inline signal booster like a Cloudlifter CL-1 or Fethead.
Feedback is that escalating loop where the mic picks up sound from the speakers, the system amplifies it, and it cycles back through the speakers getting louder each time. That screech you hear at live shows or on badly set up video calls? Textbook feedback.
To fix it: use a directional mic aimed away from the speakers, turn down the monitor volume, put more physical distance between the mic and speakers, or switch to in-ear monitors that don't bleed sound into the room at all.
Targeted EQ cuts at the specific ringing frequencies can tame stubborn feedback without killing the overall tone. A parametric EQ with a narrow Q is the precision tool for this job.
Many live sound mixers also use automatic feedback detection plugins that identify and notch out problem frequencies in real time.
A constant high-pitched noise isn't the same thing as feedback. It's typically electromagnetic interference (EMI) radiating from computer monitors, LED dimmers, cell phones, or switch-mode power supplies.
Moving the mic or cable away from the offending device usually solves it. Keep mic cables at least a foot away from power cables, and cross them at right angles if they must share space.
Sometimes the whine comes from the mic's own internal electronics (inexpensive condensers are especially guilty) or a failing phantom power supply with dirty voltage. Our guide on how to fix high-pitch noise from a microphone covers every common source and walks you through fixing each one systematically.
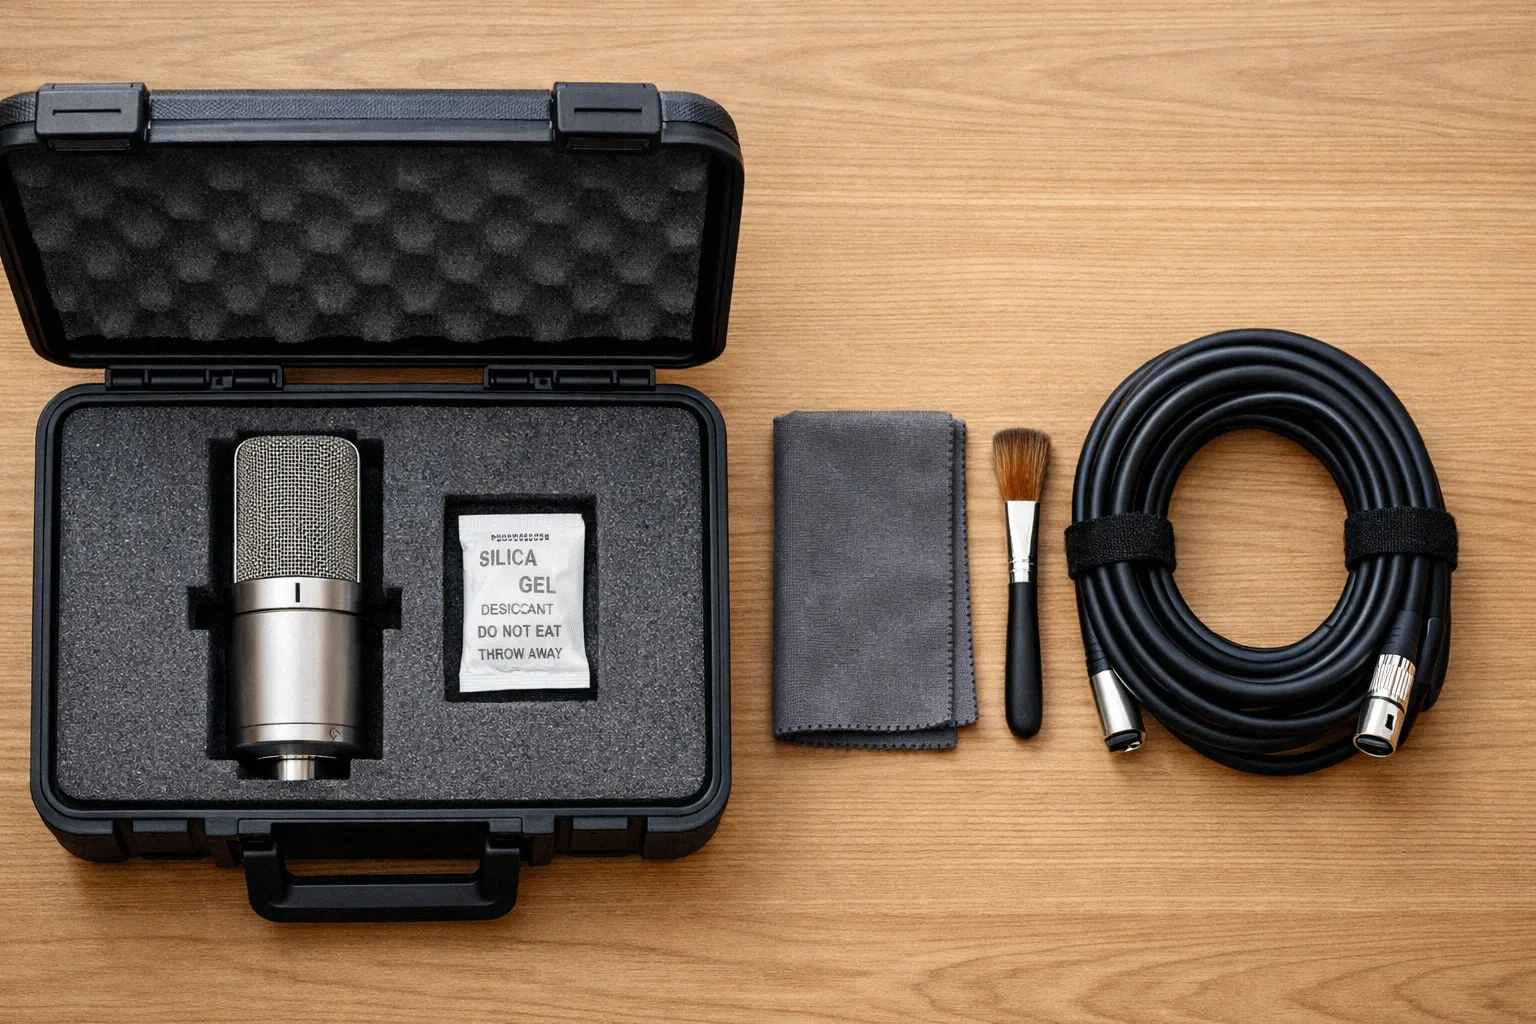
A mic that's taken care of can easily last 20, 30, even 40 years. Most of the damage we see walks in the door from totally preventable stuff: bad storage habits, rough handling, and warning signs that got ignored until something actually broke.
Always store mics in a case, pouch, or at minimum a plastic bag when they're not mounted. Condensers and ribbon mics are especially sensitive to dust settling on the diaphragm, moisture corroding internal components, and physical shock damaging delicate elements.
Keep a few silica gel packs in your mic storage area or case. Humidity is one of the biggest long-term threats to condenser capsules and ribbon elements, causing corrosion that gradually degrades performance.
Never blow into a microphone to "test" it. That burst of moisture and air pressure can damage delicate diaphragms, and in ribbon mics it can literally stretch or tear the ribbon element beyond repair.
Tap the body gently or speak into it if you need to check signal.
For external surfaces, a soft dry cloth is all you need. If the grille is removable (most handheld dynamics unscrew), take it off periodically and clean the inside with a soft brush to remove accumulated dust, dried saliva, and debris.
Pop filters and foam windscreens should be washed with mild soap and warm water every few weeks if you're recording daily. Let them air dry completely before reattaching, because putting a damp windscreen back on traps moisture against the capsule.
Never spray cleaning products, compressed air, or any liquid directly onto a microphone. Liquids can seep through the grille mesh and contact the capsule, causing permanent damage, corrosion, or short-circuiting of internal electronics.
Cables fail far more often than mics do. The most common failure point is the strain relief where the cable meets the XLR plug, especially if cables get yanked out by the cord or kinked at sharp angles repeatedly.
Coil cables in over-under loops instead of wrapping them around your elbow. The over-under technique prevents internal twisting of the conductors that weakens them over time and eventually causes intermittent crackling or total signal loss.
Label your cables and test them periodically with a cable tester. A basic continuity tester costs around $20 and saves hours of troubleshooting mysterious noise issues by catching bad cables before they ruin a recording session.
Avoid stepping on cables, running them under heavy equipment, or leaving them coiled tightly in hot spaces like car trunks. Heat and physical stress degrade the insulation and shielding over time, turning a perfectly good cable into a noise antenna.
If a condenser mic develops a persistent hiss or crackle that wasn't there before, the capsule may need re-tensioning or the internal electronics may need component replacement. This is a job for a specialized mic repair technician, not a DIY project.
Ribbon mics that gradually lose high-frequency response likely have a stretched or sagging ribbon element. Re-ribboning is a common and relatively affordable repair offered by manufacturers and authorized service centers.
Dynamic mics are the most resilient of the three types by far. If one stops working entirely, check the cable and connector first, because it's almost never the mic itself.
Internal voice coil failures do happen eventually after years of heavy use, but they're rare. For any mic type, keep the original box and packing foam if possible.
Manufacturers who accept warranty or repair returns expect the mic to arrive safely, and the original packaging is designed specifically for that. A mic shipped in a padded envelope has a decent chance of arriving damaged.
Wireless mics operate across three main bands: VHF, UHF, and 2.4 GHz. Each comes with different range, audio quality, and regulatory rules depending on your country.
Going wireless gives you freedom to move around, but it also opens up a whole different world of headaches around radio frequencies and spectrum management. If you've ever had a wireless mic cut out mid-song or heard some taxi dispatcher coming through your PA, you know exactly how frustrating it gets.
Our full guide on wireless microphone frequency bands goes deep on the technical details, legal requirements, and practical selection strategies. Here's the essential overview.
VHF (174–216 MHz). Older, budget-friendly technology. Signals carry well over distance, but they're more susceptible to interference from other VHF sources, and the limited number of available channels makes multi-mic setups impractical.
UHF (470–698 MHz). The professional workhorse band. You get more available channels, better interference rejection, and reliable performance in most venues and environments.
Worth noting: the 600 MHz band (614–698 MHz) was auctioned off for cellular carrier use in the US, so newer wireless mic systems steer clear of it entirely. Operating in this range is now illegal for unlicensed use.
2.4 GHz. Increasingly popular for digital wireless systems. It's unlicensed globally, supports high-quality digital audio, and doesn't require frequency coordination.
The trade-offs are shorter range and potential interference from Wi-Fi networks, Bluetooth devices, and other 2.4 GHz traffic sharing the same spectrum.
In the US, the FCC regulates wireless microphone operation. Some bands require a Part 74 license (typically for broadcasters and major productions), while others allow unlicensed operation under Part 15 rules with strict power output limits.
Regulations differ significantly from country to country, so always verify local spectrum rules before transmitting with wireless mic equipment internationally. Using the wrong frequency band can result in interference with emergency services and significant fines.
Run a frequency scan at the venue before every event. Most professional wireless receivers have a built-in scan function that identifies clean, unoccupied frequencies automatically and can coordinate across multiple receivers.
Keep fresh batteries in your transmitters at all times during performance. Low voltage causes signal dropouts and increased noise well before the unit actually powers off, and those dropouts always seem to happen during the most critical moments.
For events with multiple wireless mics, coordinate frequencies before the show. Shure's Wireless Workbench calculates compatible frequencies across all channels to avoid intermodulation, which is when ghost frequencies are created because two or more transmitters interfere with each other.
Not every audio issue requires hiring someone. But some problems genuinely do, and learning to tell the difference keeps you from wasting time or money.
Here's a straightforward framework to figure out which is which.
Software settings issues. Wrong input selected, gain too low, channel accidentally muted, wrong sample rate. Always check the obvious software settings before assuming hardware is broken.
Cable problems. If the crackling or dropout changes when you wiggle the cable, swap it with one you know works and move on. Always keep spare cables on hand for exactly this reason.
Basic room treatment. Hanging acoustic panels, foam tiles, or heavy moving blankets on key wall surfaces is a weekend project at most. Even imperfect treatment at the right reflection points makes a noticeably better recording.
Simple buzzing and hum. Ground loops, EMI, and USB bus noise can all be tackled with cable rerouting, ground lift adapters, ferrite chokes, or a powered USB hub that isolates bus power. Our microphone buzzing guide walks you through the complete diagnostic process from start to finish.
Persistent noise you can't track down. If you've worked through every troubleshooting step methodically and still can't identify the source, an experienced audio technician has specialized measurement equipment that can pinpoint problems like building wiring faults, HVAC-induced vibration, and RF interference sources you'd never find on your own.
Live sound for large events. Running audio for 200+ people means coordinating wireless frequencies, tuning the PA system to the room, and solving unexpected problems in real time under pressure. That skill set takes years of hands-on experience to develop.
The cost of hiring a qualified sound engineer is small compared to what a failed event costs in reputation and money.
Acoustic treatment for critical spaces. If you're building a voiceover booth, mixing room, or any space where audio quality directly generates income, professional acoustic design is worth every penny. Room modes, standing waves, HVAC noise transmission, and sound isolation all require measurement tools and specialized knowledge to solve correctly.
Recurring feedback on stage. When feedback keeps returning despite your best efforts, the PA system configuration itself probably needs rethinking. Speaker placement, monitor angles, crossover points, and mic choice all interact in complex ways that demand hands-on professional experience to optimize.
| Problem | DIY Difficulty | Cost to Fix Yourself | When to Call a Pro |
|---|---|---|---|
| Software/settings issues | Easy | $0 | Almost never |
| Cable replacement | Easy | $10–30 | Never |
| Basic room treatment | Moderate | $50–300 | If it's a commercial space |
| Ground loop/buzz | Moderate | $10–50 | If it persists after basic fixes |
| Wireless interference | Moderate to Hard | $0–200 | Events with 8+ wireless channels |
| Acoustic design | Hard | $200–2,000 | Studios, booths, critical listening rooms |
| Live sound for large events | Hard | Varies | 200+ attendees or unfamiliar venue |
| Internal mic repair | Very Hard | Parts only | Almost always (warranty or specialist) |
Each topic above goes much deeper in our individual microphone guides, with step-by-step instructions, comparison charts, and product recommendations where relevant.
Below is a quick map of our most useful guides, sorted by what you're actually trying to accomplish.
All of this comes from people who use this gear every day. If something's unclear or you want us to cover a topic we haven't gotten to yet, drop us a line.
We're always expanding this library of microphone guides with new topics, updated recommendations, and deeper technical breakdowns based on what readers ask about most.
 guide
guide AirPods microphone not working? These 11 fixes solve it fast, from a 30-second reset to hidden firmware updates most people skip. All models covered.
 guide
guide Learn how to adjust microphone sensitivity on Windows, Mac, Android, and iOS with step-by-step instructions and troubleshooting tips for common issues.
 guide
guide Learn how a microphone array uses multiple capsules for beamforming, noise cancellation, and focused sound capture in smart speakers and conference rooms.
 guide
guide Stop high-pitched microphone noise for good. This guide covers 10 proven fixes for feedback and squealing, plus quick solutions for live performances.
 guide
guide Learn which wireless microphone frequency bands are legal and which are restricted. Avoid fines and interference with this clear guide to UHF and VHF.
 guide
guide Microphone crackling is usually caused by a bad cable, loose connection, or wrong settings. This guide walks through every cause with step-by-step fixes.
 guide
guide Learn what microphone boost does in Windows and how to enable it on Windows 7, 8, and 10. Fix low mic volume and troubleshoot missing boost options.
 roundup
 Learn what a supercardioid microphone is and why it rejects more side noise than a standard cardioid. Plus, we review 10 top-rated studio picks.
 guide
guide Learn how to hold a microphone properly for singing, speaking, and rapping. Get the right grip, angle, and distance for clean audio every time.
 guide
guide Microphone capsules determine how your audio sounds. Learn how condenser, dynamic, and ribbon capsules work so you can pick the right mic every time.
 guide
guide Microphone buzzing is usually caused by loose cables, electrical interference, or wrong settings. Follow our step-by-step guide to fix it quickly.
 guide
guide Good microphone placement accounts for 20% of your recording quality. These 10 tips cover finding the sweet spot, taming plosives, and reducing noise.