What is gain on a microphone, and why does it matter so much?
Gain is one of those concepts most people never really learn, even though it’s fundamental for anyone who records music, mixes tracks, or runs a podcast. Get it right and everything sounds clean.
Get it wrong and you’ll spend hours in post trying to save a ruined take.
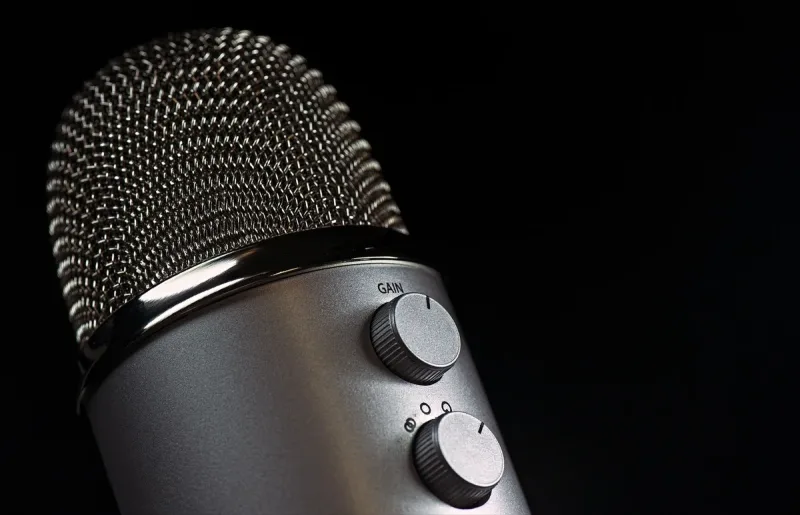
If you’ve ever bought a mic, mixer, or preamp, you’ve probably seen a gain control. It’s usually a dial or slider somewhere on the unit, and it’s the first place your microphone’s signal goes after leaving the capsule.
Some mics label their gain controls clearly, with numbered settings or high/medium/low markers. Others just give you a blank rotary knob, which makes it genuinely confusing to set properly without a reference meter.
Getting gain right doesn’t just make the signal louder. It shapes the tone, cleans up the noise floor, and sets up everything that happens next in your signal chain.
It works hand in hand with microphone sensitivity to give you the best possible result.
Trending Microphones
What is Gain on a Microphone?
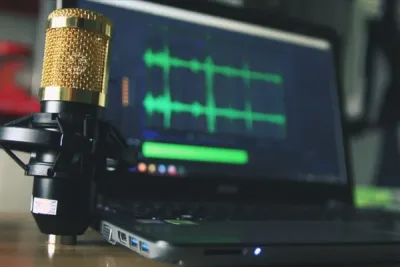
Here’s what actually happens when you speak or play an instrument into a mic. Sound travels as waves, hits the capsule, and causes it to vibrate.
Those vibrations get converted into an electrical signal, basically a small voltage. The catch is that the raw output is tiny, way too quiet to work with as-is.
This is where gain comes in. Think of it as an amplifier that takes that small signal and boosts it up to a usable level before it hits the rest of your recording chain.
It literally increases the voltage of the incoming signal, which is where the name comes from: you’re gaining voltage, gaining level, gaining signal. That boost is what gives you something loud enough and clean enough to actually record.
Gain is the very first thing that touches your mic signal on its way into a mixer or preamp, which is why setting it properly matters so much. Bad gain upstream can’t be fixed downstream.
Difference between Volume and Gain
People use gain and volume interchangeably all the time, but they’re genuinely different concepts. The confusion makes sense.
Both controls can make things louder, which is why they blur together for beginners.
Here’s the key distinction: one of them affects what goes in, and the other affects what comes out. Before we get into the difference, let’s define each one separately.
What is Gain?
So, finally, we look at this, “what is gain on a microphone?”
Well, the definition of gain in my words would be the aspect or the reason for the increase in the input signals of the amplifier.
The amplifier gain is the increase of the input signal which in turn amplifies the output result.
Gain deals with input signals for better quality and tone of the sound.
For example, if you put in an input of 2 volts and receive the output of 60 volts then the gain in the amplifier would be 20.
The gain you’ll achieve when you make an input of 2 volts is 20.
The gain is measured as the ratio of output by the input of volts, so it has no unit.
What is Volume?
In simple words, the volume is the capacity to increase or decrease the loudness of the sound you are hearing.
Volume is the output of the audio and is measured in dB (decibels).
In the case of volume, it’s easy to know where to shift the knob of volume.
If you shift it to the higher decibel side, the louder the volume will be and vice versa.
If you set the volume too low on a microphone, your voice won’t be heard by others.
If you set it too high, you’ll hear a harsh sound.
Volume vs Gain
The headline difference is this: volume only changes how loud the output is, nothing more. Turning the volume knob doesn’t affect the quality, tone, or character of the sound in any meaningful way.
It just makes it louder or quieter at the speakers.
Gain, on the other hand, lives at the input stage. It shapes the tone, the cleanliness, and the overall character of what gets recorded before anything else in the chain touches it.
Balance the two correctly and you’ll get a full, warm, distortion-free sound coming out the other end. That balance is the difference between an amateur recording and a professional one.
Methods to Set the Gain in a Microphone
In old times you would need a preamplifier separate from the microphone to have high volume in the mic.
But now, as technology diversifies, we have invented a preamplifier that is already embedded in the microphone body.
As both are two different things, the methods to set the gain of both the systems would also be different, so let’s discuss each one of them.
Steps to Set the Gain in Active Microphone
This kind of microphone is used nowadays, with the preamplifier already active within the microphone.
To set it up, you can follow the following steps:
- Turn on the sound system
- Press the button PFL (pre-fade listen) on the channel to which the mic is connected
- Set the gain level accordingly: not too high, not too low, with bars not touching the red zone
- Just maintaining a balanced healthy level that maintains the sound tone coming out from the mixer
Steps to Set the Gain of a Separate Microphone Preamplifier into the Mixer
Some microphones don’t have a preamplifier within them, that’s why a separate preamplifier is used with them to boost mic gain levels.
- Connect the preamplifier into the mixer line input
- Set the gain line level of the channel to 0 dB
- Then turn on the sound system
- Press the PFL (pre-fade listen) button of the channel to which the microphone is connected
- Use the meter of the mixer, not of the preamplifier
- Set the gain of the preamplifier to the level that the bars don’t touch the red zone
Steps to Set the Gain of the Active Preamplifier to a USB/Digital Microphone
Some microphones come up with a USB port that has an active preamplifier within the body of the microphone.
- Connect your preamplifier to one of the line input
- Now create a new channel to record
- This will show the meter of input signals of the new channel
- Now select the input source to which the preamplifier will be connected
- Turn the sound system on
- Most of the USB microphones have controllable knobs which makes it easy to set a gain meter
- Turn the dial to a 2 o’clock position to make a difference in the sound quality
For the gain setting, you need to look up the best microphone to use.
Some additional advice to set up the levels are:
Don’t try to adjust the level by your voice frequency
This means that you shouldn’t try to adjust your voice by talking slow or loud.
Instead do it in the way you want your recording to be, talk on the same pitch that is required.
Thus adjusting your voice pitch will not make any difference in the gain level. It will only make your recording weak.
Don’t adjust the mic distance
If you think adjusting the mic level will help achieve the gain better, then you are thinking wrong.
Every mic has its proximity effect so if you get too close to the mic it might get bassy. Proper microphone placement helps you avoid these issues.
The distance matters with your mic because of your vocal tones so don’t go too far from the mic.
Find the correct spot for your tone and then adjust the gain according to it.
You don’t do this only when you are very close to the mic, if you’re loud, it may disturb the actual input signal.
If you are recording your track in a loud voice close to the mic and you suddenly want to scream or whisper anything, you may need to adjust your mic.
For a whisper or lower voice, simply move the mic closer, and for the loud part, move it backward.
Don’t go too far from the mic, just keep your distance in these ranges: 2 inches, 4 inches, 8 inches, and 16 inches.
This will create a difference of 18 dB which is enough.
Don’t go more than 16 inches.
Even after adjusting the gain settings, there are still some possibilities that’ll go wrong at some point.
There might be two reasons: either you have set the gain too high or you have set it low.
If you set it too low, the signals in DAW (digital audio workstation: a software used for recording, editing, and making audios) will be low as well.
The signal-noise ratio will be bad in DAW.
If you set it too high, you are risking the clipping of signals that will cause distortion and microphone crackling which must be avoided while making tracks.
You can set the gain low if you get clipping.
The time when you should look up at your gain setting is when you are using EQ boost.
If you are using clipping, and the signal is closed to clipping it will clip it but the EQ boost will push the signals over the top.
In this case, you need to lower your gain again.
Also when your sound source is a mix, you need to set the gain low because if you set it to a balanced healthy level, the fader will be also low and it will be difficult to adjust it.
Once you adjust your gain properly, you don’t need to change until it’s disturbed by the change of microphone position or the change in the sound source.
What is a Microphone Boost?
A microphone boost application is present on the Windows PC and it also helps in boosting mic volume.
It helps in achieving a better mic quality at both ends.
It’s especially necessary when you are on video calls or skype meetings.
To have this microphone boost you need to do the following steps.
- Go to the control panel and select sound
- There you will get an option of recording, click on it.
- Here you will get an option to choose your recording device
- Choose a microphone there
- A microphone properties window will pop up
- Here you can select your level of volume and dB for microphone and microphone boost
- Shifting the levels to left and right will help you achieve your preferred mic setting
Through these simple steps, you can boost your microphone levels.
Software Tools Control Mic Gain
Even after manually setting the microphone gain setting, you need some technical settings for a professional mix.
Some free software tools help in controlling the mic gain.
The software not only helps with the microphone but also with the computer music settings.
Sometimes it happens that when you connect your mic on the PC, the sound card of your PC might not be able to handle it.
So in this case you need to select the most compatible software that works with your PC and mic.
Below are some of the best software to control mic gain that will help you in some editing and recording the tracks.
Audacity
It’s one of the best software for free sound recording and editing.
It’s easy to use because the main buttons are in large icons.
You can record the music with both of the microphones. External and internal, it gives you a lot of options for editing.
You can layer over your voice tracks and also upload your track as well.
It also has microphone booster software.
It gives you a lot more options of editing like cutting apart and adding time fade-out effects.
For ASMR bloggers, this is a special feature in recording their sound for one dynamic at a time.
Trackinton T7
Trackinton T7 has some great reviews from the ones who have it to track records in the home studio.
It can be used on any OS system for Linux, Windows, or Mac.
You can drag and drop the files easily and can create several pages for different projects.
You can easily edit your track with different layers.
The plugins and instrumental plugins don’t have much difference, you can add layer effects in your recordings.
It’s also a free premium software to use.
Mixpad
Mixpad is an easier one to use.
Its homepage pops up with information and guidelines.
Besides that, it gives you a lot of options to choose different tracks and concentrate on making your piece first then doing the changes in settings.
The mix pad also allows you to shift between windows and controls to apply different plugins, instruments, and do further editing.
It supports all kinds of music formats.
Also, it gives feasibility to import all kinds of music formats and can process single and multiple tracks even at the same time.
It’s a beginner-friendly tool to use.
This one is also free software to use.
Expstudio Audio Editor
This is only for Windows 10 PC.
It’s used for boosting microphone volume and it provides filters to clear out the uncertain distortions and frequencies.
It gives you a special feature to change the voice.
Like male into female, or any human voice into an animated voice, and so on.
It won’t allow you to export different music formats.
You have to purchase the paid version to have accessibility.
This software is also a free application to use.
VoiceMeeter
Voicemeeter applies to Windows operating systems.
It helps in improving input and output sounds.
It gives you the capability to boost one virtual mic (within the PC) and two physical microphones.
It has a VBAN feature that helps in adjusting the bit rate, sample rate, and quality of the sound.
It helps in mixing the output factors of the audio.
Voicemeter is also a free software application to use.
Equalizer APO
This software is used to modify the audios.
It gives you a preamplification tool to boost the input and output signal of the audios.
It gives you a sound filter to manage certain frequencies and offers multiple sound filters such as low, high, and bandpass.
The software also gives you two equalizers. 15 and 31 bands.
This helps to manage the frequencies manually.
This application is also a free version to use with a great variety of options.
This software is also free to use.
Filmora
This software provides features of sound and video editing.
This software allows you to record unlimited audio and video according to your PC space.
It gives you access to import 50 kinds of video, audio, and music formats.
Its user interface is friendly and easier to use and it also provides high demanding editing features.
It will adjust according to your microphone and will help you in recording the soundtrack with high definition and good volume.
You can do specific editing with your mic recording.
One amazing thing is this software is also free to use for audio and video editing.
n- track studio
It gives flexibility in editing audios and is beginners friendly.
It’s designed for multitasking with the files, you can write your music in it and can record and edit it also.
It can as well save your files in different formats and give you different frequencies to set for each type.
It’s available for smartphones, PC and Mac.
It’s not free recording software.
You have to buy its paid version for further use.
It only gives you a trial period for free and leaves its watermark on the download of Mp3 and WMA file extensions you have created.
Adobe audition
Adobe audition has been the least favorite because of issues created by the software on the PC but the new 2021 version is sure to fix all the bugs.
It’s not beginner-friendly software because the structure and placement of the icons are a bit different.
It allows you to edit your mixes with multi-channels because it gives a separate area to replace them.
It gives you more versatility in editing your tracks like changing frequency, trimming, mixing, layering, wave editing, audio restoration, and others.
It’s a great software for the ones who podcast because your voice will sound perfect if you are overlaying it directly with the music tracks.
The software also helps you in repairing your audio breaks.
One drawback it has is you only get limited features in the free version.
For more pro editing, you need to buy a paid version which is pretty expensive.
Sound forge
This is a very great software for professional mixers.
The features, icons, buttons are available but are placed in a manner that you can’t find it easily.
It’s divided into categories and subcategories.
A special feature it has is it’s very fast in the conversion of the music and audios.
You can change the color theme of the interface according to your preference and mood.
Another great feature it has is the isotope and ozone elements in the recording.
It will help you in improving your sound quality like a pro.
It gives you VST plugin support.
You can also make a multi-channel recording with this software.
It’s not fully a free version.
For isotope and ozone elements you have to buy a paid version.
There is plenty of software around to make your mixes and tracks.
Try to learn about this software more to decide which one will work best for you.
Frequently Asked Questions
What happens if I set my microphone gain too high?
Setting gain too high causes the input signal to clip, which produces harsh distortion in your recording that is very difficult to fix in post-production. You will see the meter hitting the red zone consistently.
Lower the gain until your loudest sounds peak around -6 dB to -12 dB for safe headroom.
Is microphone gain the same as microphone boost in Windows?
They are related but not the same. Gain is the analog or hardware amplification of the mic signal, usually controlled on a preamp, mixer, or audio interface.
Microphone boost is a software feature in Windows that adds digital amplification after the signal is captured. Gain gives you cleaner amplification than software boost.
Do USB microphones have a gain control, or do I need a separate preamp?
Many USB microphones have a built-in preamp with a gain knob right on the mic body, so you do not need an external preamp. If your USB mic lacks a gain control, you can adjust the input level through your computer’s sound settings or your recording software’s input slider.
Final Thoughts
Hopefully that answers the question of what gain does on a microphone, and how it fits into the bigger picture of recording.
Start by dialing in the settings that match your specific mic. Every capsule reacts differently to gain, so it’s worth spending a few minutes getting the level right before you hit record.
Keep volume and gain separate in your head. Volume only affects playback, gain shapes the character of your signal at the source.
Pick whichever editing software feels most comfortable, and don’t be afraid to combine its tools with the built-in Windows boost settings when you need extra amplification. Keep recording, keep tweaking, and your ear for proper gain will sharpen quickly.
Set your gain so the loudest parts of your recording peak around -6 dB to -12 dB without ever hitting the red zone. Remember that gain controls the input signal quality and tone, while volume only adjusts how loud the output sounds. Getting gain right at the start saves you from distortion and noise problems that are nearly impossible to fix later.