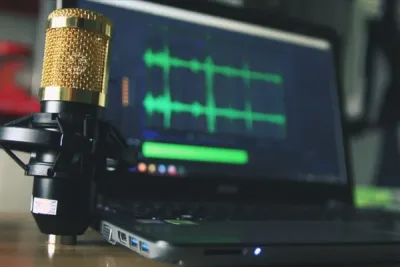

Mic placement is one of those unsexy skills that quietly makes or breaks your recordings, whether you’re tracking vocals in a home studio or capturing dialogue for a short film.
Roughly 20% of your final sound comes down to where you point the mic. That’s why pro sound engineers spend so much time fussing over placement during vocal performances.
Move the mic an inch and you can change the frequency response, shift the tone of the source, and alter how the whole mix sits together.
If you want genuinely polished recordings, dialing in your mic placement isn’t optional, it’s the fastest way to level up your sound without spending a dime on new gear.
10 Tips For The Best Microphone Placement
To help you with this, here are ten microphone placement tips and tricks you should follow.
1. Know Your Sound Sources
Your mic choice, placement, and settings contribute roughly 10%, 20%, and 20% to your overall sound, respectively. The instruments themselves make up about 50% of the picture, which puts the whole thing into perspective.
Placement and setup together account for about as much of the final sound as the instruments you’re recording.
Every instrument sounds different. A guitar, a voice, keyboards, and drums each have their own tonal fingerprint, and placement is what determines how those sources blend together in the mix.
For context: close-miking captures a hotter, more direct signal from the source, while distant miking preserves the natural tone balance and room ambience. Both have their uses.
Take a minute to listen to the instruments in the recording space and get a clear picture of the following:
- Where the sound is coming from
- The direction the sound is ending
- The distance in which the sound is fully developed
By doing this, you will be able to estimate how your microphone will capture the sounds from the sound sources and make the best decisions on the right microphone placement.
In case a particular sound source doesn’t sound right, simply swap the sound source with another.
2. Find Your Microphone’s “Sweet Spot”
Finding your mic’s sweet spot is pure trial and error, and frankly, it’s more art than science. You can’t predict where it’ll land ahead of time, which means you just have to put in the time to find it.
It’s worth every minute though, because once you hit the sweet spot, you’ll hear the difference instantly.
What Is The Microphone “Sweet Spot”?
Put simply, the sweet spot is where the mic sits relative to your sound source so that source sounds its absolute best. It’s not a fixed location, it shifts depending on the source itself and the acoustic environment you’re in.
A sound source can sound totally different based on where the mic sits and where you’re standing as the listener. If you want clean, professional-sounding recordings, locking in the sweet spot isn’t optional.
How To Find The Sweet Spot?
There are specific methods that can help you find the sweet spot for your microphone.
But, first and foremost, always trust your ears!
Listen to the recording space’s acoustic sound and capture the sweet spot where your sound has the most balanced representation.
Also, to achieve that smooth edge in your recording, you have to try different acoustic environments until you locate the best starting position.
Also, the polar pattern of your microphone can help you find the sweet spot.
Stereo Microphone Pattern
When placing stereo microphones, cup both ears with your hands and move around the sound source until you find the spot where the sound is most balanced.
Omnidirectional Pattern
Plug one ear and carefully listen with the other while moving around the sound source.
Now that you’ve found the sweet spot, set up the Omni-mic there and let the microphone capsule occupy the position where your open ear was.
Cardioid Microphones
Cover one ear with your hand while cupping the other.
Listen closely with the open ear and move around the sound source until you locate the sweet spot.
Once you’ve found the sweet spot, place the mic there with the capsule pointing to your palm at an angle of 90° toward your mouth.
3. Understand Your Microphone’s Polar Pattern
For optimal mic placement, it is essential to understand the polar patterns of your microphone.
What Are Microphone Polar Patterns?
Although it may sound a bit complicated, a microphone polar pattern determines the microphone’s directional sensitivity at different angles.
In other words, the polar patterns of the microphone will give you an intuitive idea of the direction(s) in which the mic is most sensitive.
A good understanding of how your mic’s polar pattern works will help you visualize how the mic reacts to sound waves picked from different directions.
It will also help you to make informed decisions on suitable microphone placement.
To help you utilize this information in positioning a mic, let’s run over the three most common polar patterns:
Omnidirectional Polar Pattern
The omnidirectional pattern has an equal sensitivity to sound pressure from all directions.
Typically, Omni microphones pick up sound from all directions without interfering with the overall recordings.
An Omni pattern has no proximity effect—and so it has the best frequency and bass response.
In comparison to other microphones, this pattern is less sensitive to positioning.
However, Omni microphones are hard to deal with in most live recording sessions.
They can easily capture unwanted sounds in the recording environment.
Bidirectional (Figure-8) Polar Pattern
A Figure-8 microphone detects the pressure of sound waves only from the front and the back.
This pattern is common in stereo recording techniques.
It’s also useful in a live recording—it can clearly capture the sound source and natural room ambiance of the recording space.
Cardioid Polar Pattern
This polar pattern is highly sensitive to sound pressure coming from the front of the mic and less sensitive when the sounds are coming from the sides and back.
These microphones are ideal for recordings that need a moderate proximity effect.
Once you’ve understood how different polar patterns work, you will not only be able to position your microphone in the right position, but you’ll also be able to pick the right microphone for a particular event.
4. Know The Proximity Effect
For mic placement, the microphone proximity effect is another factor you should consider.
Having a good understanding of your microphone’s proximity effect can significantly aid your mic positioning.
But, if you’re not careful, it can ruin your impeccable voice project.
What Is The Proximity Effect?
The proximity effect is a low-frequency increase that happens when the microphone moves closer to the sound source.
That is, if the sound source is too close to the microphone, the bass frequency will be greater.
The proximity effect will show up at a frequency range of 200 to 600Hz.
The proximity effect varies depending on the sound pressure differences between the front and the rear sides of the microphone diaphragm.
Bidirectional mics have both front and rear sides of their diaphragms exposed to the external sound pressure.
So they exhibit a higher degree of proximity effect.
Depending on the sound you want to achieve for your recording, how you exploit your mic’s proximity effect is essential.
Excess proximity effects can alter your vocals and make them boom.
If you aim to have a bass frequency, try and move the mic closer to the sound source.
To eliminate the proximity effect buildups, use different directional polar patterns and multiple mic’s.
5. Get The Distance Right
Are you planning to start a career in the voice-over industry?
Or maybe, you’ve already started working on a few voice-over projects, and you wonder how do you enhance your skills?
To succeed in your voice-over tasks, you should not only work on your voice, but you should also learn the ideal distance between your mouth and the microphone.
What Is The Ideal Microphone Distance From The Mouth?
Maintaining an appropriate distance between the mouth and the mic will enable the microphone to pick up the sound of your voice and minimize the chances of picking up the external noises in the room.
The golden rule of thumb of microphone placement is to place the microphone about 6-12 inches away from the speaker’s mouth.
However, the recommended distance from the mouth varies depending on the type of microphone.
For example:
Cardioid Mics
Cardioid microphones will give warm and intimate results if placed six inches away from the mouth.
Dynamic Mics
With a dynamic microphone, you can place them as close as you want.
They are designed such that they can prevent the proximity effect.
Omnidirectional Mics
Compared to Cardioid microphones, Omni microphones can give you clear vocals even with a distance range of 1 inch without affecting the vocal recording.
If you want to find the right microphone placement range where your voice is at its absolute best, you have to try different microphone positions at various degrees.
To help with this, when positioning the microphone, remember not to place it too close to the sound sources.
Placing it close to the sound sources can cause the instrument to lose timbre, and also, it may increase the low-frequency response resulting in a bassy voice.
6. Limit Ambient Sounds
Ambient sounds are all those sneaky “other noises” in your recording environment that the mic is liable to capture alongside your intended source. And some mics are so sensitive they’ll grab every little thing happening in the room.
These stray noises are what give you that hollow, amateur sound or, worse, microphone buzzing that instantly tanks your recording quality.
Here are some of the usual culprits you’ll want to shut down before you hit record:
- Cell phone notifications
- Room tone
- Mouse and keyboard clicks
- Clicking heels
- Watches
- Audible body movements
- Pet noises
- Cars or people outside
While recording, you may not hear these sounds until you’re listening back to your recording.
The sensitivity of the microphone to these external noises will vary depending on the mic position, brand, and type.
To improve the quality of your voice-over recordings, try and do a real quick test by plugging in your headphones and listen to hear what your microphone hears.
Once you master the ambient sounds in the acoustic space, try and reduce them as best as you can.
And there you go!
You now have fewer ambient sounds in your recording space—so you’ll have a crystal idea of where to set up your microphone for clear audio without interruptions.
7. Use Pop filters
Walk into any serious studio and you’ll see a pop filter sitting between the mic and whoever’s talking into it. That’s no accident, pop filters are absolutely essential gear for any voice recording setup.
What Is A Microphone Pop Filter And Why Is It Necessary To Use One?
A pop filter shields the microphone capsule from the plosive air gusts in the speaker’s mouth—(hence the common name “pop shields”)
Generally, the popping sounds can be more intense depending on how close the speaker’s mouth is to the microphone.
Therefore, pop filters’ conscious positioning will help you maintain a consistent distance between your mouth and the microphone.
The pop filters can also block the “p” pops sounds from reaching the microphone diaphragm without interfering with the tone of your voice.
Less “p” pops in your final recording means minimal editing!
That being said, in your next recording session, try and create a reasonable distance between your mouth and the microphone using a pop filter.
A good rule of thumb is to position the pop filter 4 inches away from the microphone.
8. Understand The Effect Of Vocal Plosives
Whether you’re recording at home or in a pro studio, mic placement needs to be strategic if you want to tame plosive sounds.
When I say plosives, I mean those natural blasts of air that come out of your mouth when you talk. They form when airflow gets partially blocked by your tongue, teeth, or lips as you pronounce consonant sounds like P, B, and T.
Depending on where your mic sits, these plosives can wreck your recording. That sudden burst of air overloads the capsule and creates those nasty “pop” or “thud” sounds you’ve definitely heard on lower-quality podcasts and YouTube videos.
Here are a couple of tips to tame them:
Distance
When recording, move the microphone further away.
Maintaining such distance will diffuse the air gusts ( plosive energy) in the medium before they reach the microphone diaphragm.
Off-axis
Slightly tilt your microphone off-axis to block these plosive sounds from hitting the microphone directly.
9. Try Different Mics Around The Same Sound Source
No two mics are identical. Every one has its own character, frequency response curve, and quirks that show up differently across the spectrum.
Some mics don’t even play nicely together because their sonic fingerprints clash.
When you aim multiple microphones at the same sound source, they’ll each produce a different output signal, and that’s actually useful information. Before a session, set up two or more mics near the source and record them all.
Inevitably, one will capture the source better than the others, and you’ll hear which one wins pretty quickly.
If you’re running multiple mics on different sound sources in the same room, stick with a natural-sounding mic to keep things consistent. Then listen back, compare takes, and let your ears decide which mic and placement sounds best.
10. Experiment
So you now know about polar patterns, sound sources, and the sweet spot. Ready to hit record?
Not quite.
Here’s the honest truth: there is no perfect mic position. Whether you’re doing voiceover work or recording a podcast, you need to blend and experiment with different positions until you find a starting point that works.
And knowing how to hold a microphone properly factors in too.
Every recording is different. What worked for your last session won’t necessarily work for the next one, because the room, the source, your mood, and the material all change.
That’s why mic placement is a repetitive, ongoing process. You experiment, calibrate, listen back, then tweak again until you’re hearing exactly what you want.
If something’s still off, move the mic, adjust the angle, change your distance. Don’t be afraid to repeat the process as often as it takes.
That iteration is where the magic actually happens.
Frequently Asked Questions
How far should a microphone be from your mouth for voice-over recording?
For most voice-over work, 6 to 12 inches is the recommended distance. This range captures a clear, full vocal sound while minimizing plosive pops and the proximity effect that makes your voice sound overly bassy.
Use a pop filter to help maintain consistent spacing.
Does microphone placement change depending on the type of instrument being recorded?
Yes, every instrument has a different sweet spot. For example, placing a mic 2 to 4 inches from a guitar amplifier’s speaker cone captures a bright, focused tone, while pulling it back 12 inches or more blends in more room ambiance.
Experimentation is key for each instrument.
What is the proximity effect and how does mic placement control it?
The proximity effect is a boost in bass frequencies that occurs when a directional microphone is placed very close to a sound source. Moving the mic further away reduces this bass buildup.
Singers sometimes use it intentionally for a warmer tone, but for spoken word it can make audio sound muddy.
Final Thoughts
Any vocal recording lives or dies by where you put the mic. Even the best mic on the market will deliver mediocre results if you point it in the wrong direction, which is why learning proper microphone placement is a skill worth developing over time.
When you’re dialing in placement, remember that every instrument has its own ideal positions. There’s no universal rule that works for all of them.
For cleaner vocals with fewer plosives and pops, aim for 6 to 12 inches from your mouth, and always spend a few minutes experimenting with positions before you hit record to find the sweet spot for your setup.
Master these placement fundamentals and you’ll have the tools to get noticeably better recordings every single time.
Place your mic 6 to 12 inches from your mouth, use a pop filter, and always find the sweet spot through experimentation before you hit record. Every room and every instrument sounds different, so there's no universal perfect position. Trust your ears over any rule of thumb and test multiple placements until you hear the cleanest, most balanced sound.